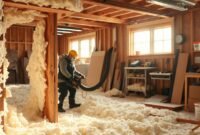
Trying to cut batt insulation can make a simple project hard. If you cut it wrong, you’ll get gaps. This can make your home less energy-efficient and even cause moisture damage.
This guide will show you how to cut fiberglass insulation safely. You’ll learn how to measure and cut like a pro. It doesn’t matter if you’re a DIY expert or just a homeowner. These steps will help you cut batt insulation like a pro.
We’ll cover the key techniques and safety tips. You’ll also get pro advice to make your insulation job go smoothly. Get ready to make your space cozy with the right insulation cuts!
Essential Safety Equipment for Cutting Insulation
When working with fiberglass insulation, safety comes first. The right protective gear helps avoid skin irritation, breathing problems, and long-term health risks. Knowing how to cut insulation safely means you need to protect yourself fully.
Personal Protective Gear Checklist
Before starting any insulation job, I make sure I have the right gear. I wear long sleeves, pants, and safety equipment to protect myself from dangers.
- Full-length, tightly woven long-sleeve shirt
- Long pants with no exposed skin
- High-quality work gloves
- Safety glasses or protective goggles
- Dust mask or respirator
- Closed-toe work boots
Workspace Safety Requirements
Setting up a safe workspace is key when cutting insulation. Good preparation helps avoid health risks and makes work easier.
| Safety Requirement | Recommended Action |
|---|---|
| Ventilation | Work in well-ventilated areas or outdoors when possible |
| Work Area Preparation | Clear workspace of unnecessary items and cover surrounding surfaces |
| Dust Control | Use fans to improve air circulation and minimize dust accumulation |
| Emergency Preparedness | Keep first aid kit and water nearby for immediate cleaning |
Wearing long protective clothes and following safety rules greatly lowers the risks of working with fiberglass insulation. These steps keep you safe and help your insulation project succeed.
Read also: How to Keep Insulation From Falling Down?
Required Tools and Materials for the Job
Cutting batt insulation needs the right tools for a smooth job. A sharp utility knife is key. Not all utility knives work well with insulation, I’ve found.
For cutting insulation, choose high-quality tools for precise cuts. Here’s what you’ll need:
- Extendable utility knife with snap-off blades
- Measuring tape
- Straight edge or T-square
- Permanent marker
- Work surface (plywood or sturdy table)
A sharp utility knife is essential for cutting insulation. An extendable knife with snap-off blades is versatile. It ensures a sharp edge always.
Pro tip: Always have extra blades ready. Replace them often for clean cuts. A dull blade can ruin your work, making it look bad.
How to Cut Batt Insulation: Step-by-Step Process
Cutting batt insulation needs precision and careful technique. My DIY insulation installation guide will show you how to make clean, accurate cuts. These cuts ensure your insulation fits right and saves energy.
Preparation Steps
Before you start, get all your tools ready and set up a clean, well-lit area. Lay out your insulation on a flat, sturdy surface. Make sure you have enough space to move around.
- Measure the space where insulation will be installed
- Mark precise cut lines using a straightedge or measuring tape
- Ensure your work surface is clean and free from debris
Cutting Techniques
For cutting batt insulation, I use a snap-off utility knife with an extended blade. It’s important to keep your hand steady and make a clean cut in one smooth motion.
- Position the insulation with the paper backing facing up
- Hold the utility knife at a 45-degree angle
- Gently compress the insulation with a straight edge
- Cut in a single, continuous motion
Pro tip: Always cut the insulation slightly larger than the intended space. You can trim excess material, but you can’t add more once it’s cut too small. With practice, your DIY insulation installation skills will improve, resulting in professional-looking results.
Read also: Basement Ceiling Insulation Faced or Unfaced
Best Practices for Measuring and Marking
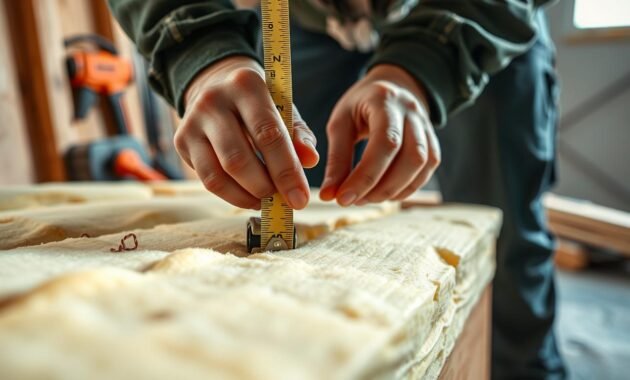
Getting the measurements right is key to a successful insulation job. When you measure batt insulation, being precise is essential. You want a perfect fit to block air gaps and save energy.
Here’s how I trim insulation for wall cavities:
- Measure the cavity width precisely
- Add an extra 1/2 inch to ensure a snug fit
- Use a permanent marker for clear cutting lines
- Create cardboard templates for irregular spaces
Pro tip: Cut batt insulation a bit larger than needed. This lets it compress and seal tight, stopping air leaks. Always use a strong tape measure and mark your cuts before you start.
For tricky wall cavities, making a cardboard template first helps. It saves time and cuts down on waste. Just trace the template on your insulation to fit around obstacles like electrical boxes and pipes.
| Measurement Technique | Best Practice |
|---|---|
| Standard Wall Cavity | Measure + 1/2 inch overlap |
| Irregular Spaces | Use cardboard template |
| Marking Method | Permanent marker or masking tape |
Spending a bit more time on measuring can save you a lot of hassle later. Accurate measuring and marking are the first steps to great insulation.
Professional Tips for Clean and Precise Cuts
Getting perfect cuts in home insulation needs skill and the right method. Professional installers know precision is key with batt insulation. The difference between a good and great job often comes down to cutting techniques.
Mastering cuts every time means knowing some key strategies. These can change your home insulation installation process. I’ve learned that preparation and technique are key for perfect cuts.
Knife Handling Techniques
- Always use a sharp utility knife with replaceable blades
- Hold the knife at a consistent 90-degree angle
- Apply steady, even pressure during cutting
- Use long, smooth strokes instead of jagged movements
- Replace blades frequently to maintain cutting precision
Avoiding Common Cutting Mistakes
Many DIY fans make big mistakes that hurt insulation quality. Here are some common errors to avoid:
- Rushing through the cutting process
- Using dull or damaged blades
- Cutting without a stable cutting surface
- Inconsistent measuring and marking
- Applying uneven pressure during cuts
Pro tip: Make a simple wooden cutting guide for straight, consistent cuts. This method keeps cuts uniform and cuts down on waste in your insulation project.
Alternative Cutting Methods and Tools
When cutting fiberglass insulation, I’ve found many tools that help. A utility knife is my go-to, but other methods can solve specific problems.
Looking into different fiberglass insulation cutting techniques shows us many tools. Each one is good for different tasks:
- Heavy-duty scissors: Great for thin insulation batts and fine cuts
- Insulation shears: Made for cutting insulation materials
- Electric carving knives: Good for thick batts and fast cuts
- Specialized insulation cutting tools: For professional, precise work
Try out different tools to see what works best for your project. Each method has its own benefits, depending on the insulation’s thickness and your project’s needs.
When choosing a tool, safety and clean cuts are key. A sharp utility knife and a sturdy cutting board are usually the best for most jobs. Always wear protective gear and work in a well-ventilated area to avoid risks.
Pro tip: Keep your tools sharp and clean. Dull blades make cutting hard and can lead to uneven cuts with fiberglass insulation.
Proper Material Handling Techniques
When working on home insulation, knowing how to handle materials is key. It ensures safety and the best performance of your insulation batts.
Cutting insulation batts to size needs careful preparation and storage. I’ve found a few important strategies to manage insulation well:
- Store insulation in a dry, temperature-controlled environment
- Keep materials in original packaging until ready to use
- Allow insulation to acclimate to room temperature before installation
- Avoid unnecessary compression of insulation batts
Material Preparation Essentials
Before starting, it’s important to take some protective steps. When handling fiberglass insulation, skin protection is essential. I use baby powder on exposed skin to prevent irritation from glass fibers.
| Handling Technique | Purpose | Recommended Action |
|---|---|---|
| Temperature Acclimation | Improve Workability | Let insulation sit at room temperature for 2-3 hours |
| Skin Protection | Prevent Irritation | Apply baby powder to exposed skin |
| Batt Support | Maintain Integrity | Support cut pieces from underneath |
Facing Insulation Tips
When working with faced insulation, keep the facing intact until you’re ready to install. This helps keep fibers in and makes handling easier. Always support the cut batts to avoid stretching or tearing.
Troubleshooting Common Cutting Problems
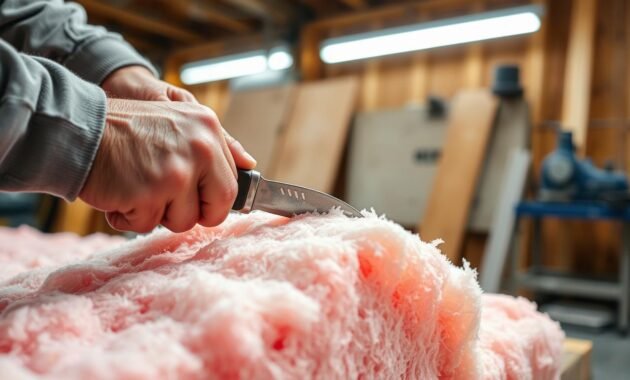
When you start your diy insulation project, you might face some challenges. Cutting fiberglass insulation safely requires precision. Knowing how to solve common cutting issues can save you time and materials.
Dull blades are often the main cause of messy cuts. If your knife can’t cut through smoothly, it’s time for a new blade. A sharp utility knife is vital for clean, precise cuts.
- Check blade sharpness before starting your cut
- Replace blades that show signs of wear or dulling
- Use consistent, steady pressure when cutting
Uneven cuts can happen if you rush or cut unevenly. Use a straight edge or measuring tape to guide you for precision. For tricky cuts around outlets or pipes, break them down into smaller parts.
For thicker insulation batts, make multiple light passes instead of one hard cut. This method prevents tears and keeps the insulation intact. Cutting fiberglass insulation safely requires patience.
- Take your time with complex cuts
- Use multiple light passes for thick insulation
- Maintain a steady hand and consistent pressure
Remember, the more you practice, the better you’ll get at diy insulation installation. Every cut you make will help improve your skills and confidence.
Post-Cutting Clean-up and Maintenance
After you finish installing home insulation, cleaning up is key. It keeps your workspace safe and professional. Cutting fiberglass insulation safely means paying close attention to your area and tools.
I’ve created a clean-up plan that keeps things tidy and safe. It involves several steps to handle insulation fibers well. This way, you can keep your work area clean.
Workspace Cleaning Strategy
- Use a wet/dry shop vacuum to collect loose insulation fibers
- Lightly mist the area with water to help fibers clump together
- Vacuum the entire workspace thoroughly
- Follow up with a damp mop to capture remaining particles
Tool Maintenance Techniques
It’s vital to keep your tools clean when cutting fiberglass insulation. I suggest a detailed cleaning routine. This prevents fibers from building up and keeps your tools working well.
| Tool | Cleaning Method | Frequency |
|---|---|---|
| Utility Knife | Wipe with damp cloth | After each use |
| Measuring Tape | Clean with alcohol wipe | After project completion |
| Work Gloves | Wash separately from other laundry | After each use |
Don’t forget about personal clean-up. I always take a cool shower after working with insulation. This removes fibers from your skin. By following these tips, you’ll have a clean, safe, and professional workspace every time.
Conclusion
Learning to cut batt insulation can boost your home improvement skills. I’ve shared detailed strategies to make the process easy and professional. You’ll keep your home energy-efficient and safe.
Success in home insulation comes from being patient and precise. Every cut is important with insulation materials. Use the right tools, wear safety gear, and measure carefully for perfect results.
Cutting batt insulation is more than just technique. It’s about making your home comfortable. With practice, you’ll become confident in handling insulation projects. Your home’s warmth depends on these details.
Whether you love DIY or want to save on energy, learning to cut batt insulation is key. It saves money and makes your home more comfortable. Take your time, stay safe, and enjoy the feeling of a job well done.
