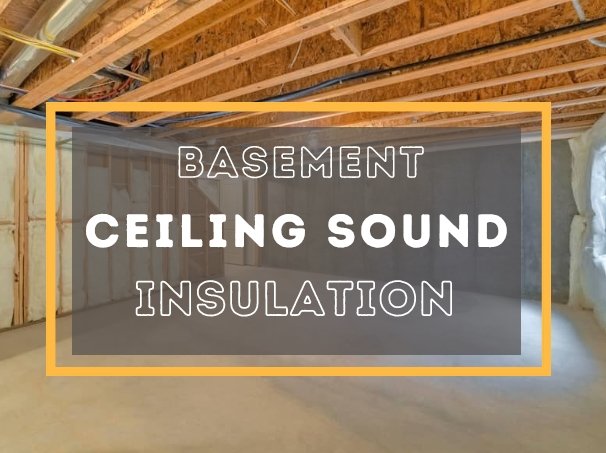
Is your basement too noisy? Footsteps, dropped items, and sounds from above can make it a battle zone. But, there’s a solution. Adding mass, sealing cracks, and using soundproofing panels can make it quiet.
Let’s explore sound barriers and thermal insulators. They help soundproof your basement ceiling effectively.
Read also: What is the Best Insulation for Basement Ceiling?
Key Takeaways
- Use 5/8-inch fire code drywall for better soundproofing
- Apply four layers of drywall for maximum effectiveness
- Seal cracks with Green Glue soundproofing compound
- Install fiberglass or mineral wool insulation for sound absorption
- Use metal hat channels and sound isolation clips to minimize vibrations
- Consider MLV barriers for pipes and HVAC systems
- Don’t forget to soundproof doors for complete noise control
Why Soundproof Your Basement Ceiling?
I’ve found that soundproofing your basement ceiling can really change your living space. It’s not just about cutting down on noise. It’s about making a cozy place for everyone in the house. Let’s look at the benefits and common noise problems that make insulation basement ceiling sound dampening so important.
Benefits of Soundproofing
Soundproofing your basement ceiling has many benefits:
- Reduces noise transmission by up to 90%
- Creates a peaceful environment for activities like watching movies
- Improves privacy between floors
- Enhances overall living experience
Adding mass to your ceiling with insulation and mass loaded vinyl can boost soundproofing by 30%. This means less sound vibrations traveling between levels. Your home will be quieter and more enjoyable.
Read also: Exposed Garage Ceiling Insulation
Common Noise Problems
Basements have unique noise challenges because of their underground location. Here are some typical issues:
- Footsteps and dropped items from above
- Conversations and music (airborne sounds)
- Mechanical noise from HVAC systems and pipes
- Flanking noise through wall joists and ductwork
Concrete slab floors in unfinished basements can make sound transmission worse. To absorb sound and reduce basement noise, consider installing absorption foam or flooring underlayments. These materials help dampen sound vibrations and make your space more peaceful.
Soundproofing Method | Noise Reduction |
---|---|
Adding mass (insulation, MLV) | Up to 30% |
Sealing gaps with acoustical caulk | Up to 80% of airborne sounds |
Using acoustic panels and diffusers | Up to 40% overall sound level reduction |
Cost-effective DIY methods | 15-20% sound reduction |
Key Components of Sound Insulation
Understanding the core elements of basement ceiling sound insulation is key. Mastering these components can significantly improve sound barriers. Let’s explore the main aspects that block unwanted noise.
Mass and Density Explained
Mass and density are the foundation of sound insulation. They determine how well materials block sound. Denser materials absorb sound waves better, making them effective for sound barriers in basements.
Here’s a comparison to show the effect of mass and density on sound absorption:
Material | Density (kg/m³) | Sound Absorption Coefficient |
---|---|---|
Fiberglass | 12-14 | 0.65 |
Mineral Wool | 30-100 | 0.95 |
Mass Loaded Vinyl | 1,800-2,000 | 0.25 |
Importance of Air Gaps
Air gaps are vital in sound insulation. They reduce sound transference by breaking the sound wave path. This helps dissipate energy and reduce vibrations.
Using dense materials with air gaps creates a strong sound absorbing system. This is great for basement ceilings, where both airborne and impact noises are a problem. By using these components, you can make a sound barrier that improves your living space’s comfort.
Types of Insulation Materials
There are many soundproofing materials for your basement ceiling. I’ll explain the most effective ones.
Mineral Wool vs. Fiberglass
Mineral wool and fiberglass are top picks for soundproofing. Mineral wool, or Rockwool, is denser and better at blocking sound. Fiberglass is lighter but also absorbs sound well. Both can fill joist cavities in basement ceilings.
Using Mass Loaded Vinyl (MLV)
Mass loaded vinyl mlv is a thin, flexible material. It adds a lot of mass to your ceiling. It’s great for blocking sound. I suggest putting MLV between drywall layers for the best results.
Soundproof Drywall Options
Adding drywall is key for sound insulation. Use 5/8-inch thick fire-code drywall for better soundproofing. It’s more effective than standard 1/2-inch drywall. Adding multiple layers with Green Glue in between boosts noise reduction.
Material | Sound Reduction | Installation Difficulty | Cost |
---|---|---|---|
Mineral Wool | High | Moderate | Moderate |
Fiberglass | Moderate | Easy | Low |
Mass Loaded Vinyl | Very High | Moderate | High |
Soundproof Drywall | High | Difficult | High |
Using these materials together often works best. For example, combining mineral wool, MLV, and soundproof drywall creates a strong sound barrier for your basement ceiling.
Advanced Soundproofing Methods
I’ve looked into advanced ways to improve sound insulation in basements. These methods are more than just basic insulation. They can greatly reduce noise.
Installing Resilient Channels
Resilient channels are a big help in sound dampening. They are metal strips that create a gap between the ceiling joists and drywall. This gap stops vibrations from passing through, which reduces noise.
I’ve seen that resilient channels can cut down sound transfer by up to 60% if done right.
Green Glue for Damping
Green Glue is a special soundproofing product that works great for dampening sound. It’s a viscoelastic compound that turns sound energy into heat. I put it between drywall or other materials.
This method can reduce noise by up to 90% when combined with other soundproofing methods.
Sealing Gaps and Cracks
Don’t forget the small stuff! Sealing gaps and cracks is key for soundproofing. I use acoustical caulk to fill in openings around outlets, pipes, or where walls meet the ceiling.
This step stops sound from leaking and makes your soundproofing work better.
Method | Noise Reduction | Ease of Installation | Cost |
---|---|---|---|
Resilient Channels | Up to 60% | Moderate | $$ |
Green Glue | Up to 90% | Easy | $$ |
Acoustical Caulk | Varies | Easy | $ |
Tackling HVAC and Pipe Noise
HVAC systems and pipes are big noise makers in basements. Let’s look at ways to quiet them down and make your space more peaceful.
Soundproofing Ductwork
HVAC ducts can spread sound all over your home. I suggest wrapping ducts with insulation or using sound-dampening liners. This method absorbs sound and acts as a barrier, lowering basement noise.
Controlling Pipe Vibration
Pipes can also make a lot of noise in basements. To fix this, use pipe insulation, isolation hangers, or wrap pipes with mass loaded vinyl (MLV). These steps reduce vibrations and stop noise from spreading through your home.
Mechanical Room Isolation
It’s important to isolate your mechanical room for less noise. Using soundproofing materials and air gaps can greatly reduce sound transmission. This keeps sound contained, making your basement quieter overall.
Noise Source | Soundproofing Method | Effectiveness |
---|---|---|
HVAC Ductwork | Insulation wrapping | High |
Pipes | MLV wrapping | Medium to High |
Mechanical Room | Isolation with air gaps | Very High |
By focusing on these areas, you can make your basement much quieter and more comfortable. Don’t forget to keep your HVAC system in good shape after soundproofing. Regular maintenance helps keep the peace and prevents sudden noise problems.
Drop Ceiling vs. Direct Mounting
When it comes to soundproofing a finished basement, I’m often asked about the best ceiling options. Let’s dive into two popular choices: drop ceilings and direct mounting.
Pros and Cons of Drop Ceilings
Drop ceilings are a versatile option for basement soundproofing. They create a cavity between the ceiling and grid system, which helps reduce noise transmission. I love that they offer easy access to plumbing and wiring, making maintenance a breeze. Plus, with a variety of tile options, you can customize your basement’s look.
But, drop ceilings have some drawbacks. They require a minimum height of 3 inches, which might not work in all basements. They also take up more headroom compared to direct mounting – up to 5 inches in some cases.
Direct Mount Solutions
Direct mounting involves attaching soundproofing materials directly to the joists. This method is great for DIY enthusiasts as it’s simpler to install. I’ve found that direct mount ceilings save valuable headroom and provide easier access to fixtures.
On the downside, drywall panels used in direct mounting can be heavy, weighing around 60 pounds. You’ll need at least two people for installation. While direct mounting can be effective for soundproofing, it doesn’t offer the same level of customization as drop ceilings.
Ultimately, the choice between a drop ceiling and direct mounting depends on your specific needs, budget, and basement layout. Both options can effectively use soundproofing materials to create a quieter space in your finished basement.
Budget-Friendly DIY Soundproofing
I’ve found some smart ways to soundproof a basement ceiling without spending a lot. We’ll look at affordable materials and a simple guide to make your space quieter.
Affordable Materials to Use
When picking a soundproofing product, I look for cheap options. Here are some affordable materials that work well:
- Fiberglass insulation
- Acoustic caulk
- Mass loaded vinyl (MLV)
- Green Glue compound
- Resilient channels
Fiberglass insulation is easy to find at home improvement stores. It’s cheaper than Rockwool but absorbs sound well.
Step-by-Step DIY Guide
To soundproof a ceiling on a budget, follow these steps:
- Clear the work area and cover vents
- Seal cracks in the subfloor with acoustic caulk
- Install fiberglass insulation between joists
- Apply mass loaded vinyl over the insulation
- Attach resilient channels perpendicular to the joists
- Install two layers of 5/8-inch fire code drywall
- Apply Green Glue between drywall layers for extra damping
Read also: 3 Blown In Fiberglass Insulation Problems
This DIY method greatly improves sound insulation while saving money. Adding more mass helps absorb sound better.
Material | Cost | Effectiveness |
---|---|---|
Fiberglass Insulation | Low | Good |
Mass Loaded Vinyl | Medium | Very Good |
Green Glue | Medium | Excellent |
Resilient Channels | Low | Very Good |
Professional Installation Considerations
Soundproofing your basement ceiling can be tricky. Sometimes, it’s better to get help from experts. We’ll look at when you might need a pro and what it could cost.
When to Hire a Pro
If your basement is finished or you need a strong sound barrier, get a pro. They can install special materials and handle big changes. They’re also great for tricky HVAC systems.
Cost of Professional Help
Professional soundproofing costs a bit, but it’s usually worth it. Prices depend on your basement’s size and the job’s complexity. Basic setups might cost $2-$4 per square foot. More complex jobs could be $10-$15 per square foot.
Project Complexity | Estimated Cost (per sq ft) |
---|---|
Basic Soundproofing | $2 – $4 |
Advanced Solutions | $10 – $15 |
While DIY can save money, pros ensure the best results. This is key for top-notch soundproofing in your basement. The quality and peace of mind are worth the extra cost.
Conclusion: Achieving Quiet Basements
Basement ceiling sound insulation is a big help in making living spaces quiet. SWO Contracting in London, Ontario, has over 25 years of experience. They show that getting professional help is important for soundproofing.
LuxeLayer’s acoustic panels come with a 10-year warranty. They are stylish and functional for soundproofing basements. These panels help in making your basement quieter.
Using AudioSeal® Soundproofing Barrier, Green Glue, and RSIC Clips can make your space as quiet as a studio. It’s not just the ceiling that matters. Walls, floors, and windows also play a big role in blocking sound.
Products like PrivacyShield® Door Seal Kit and Iso-Step® Soundproofing Underlayment help block sound from all sides. This makes your space quieter.
It’s important to install these solutions correctly to avoid problems. Whether you want a home theater or a quiet office, soundproofing your basement is worth it. It can increase your property value and improve your life quality.
With the right steps, you can make your basement a peaceful place. It will be free from unwanted noise.