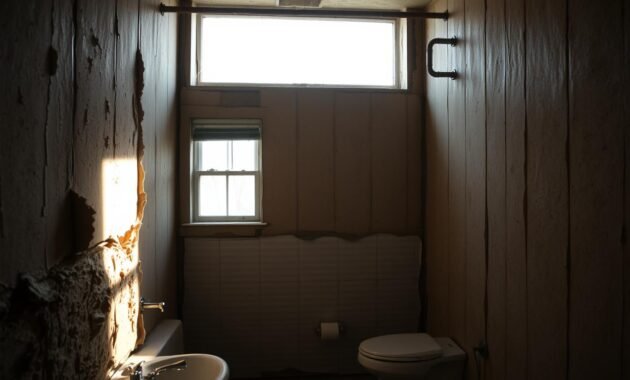
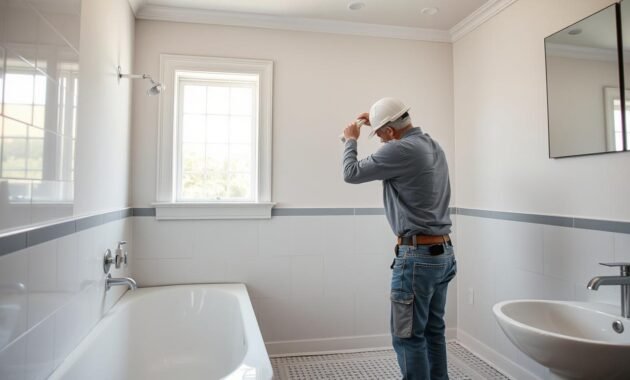
Do you have cold, damp bathroom walls that make your home uncomfortable? Many people struggle with inefficient insulation in their bathrooms. Moisture, temperature changes, and high energy bills can make your bathroom a nightmare.
Choosing the right insulation for your bathroom walls is key. It’s not just about feeling comfortable—it also protects your home and saves money in the long run.
The answer lies in effective insulation that fights moisture, saves energy, and makes your bathroom cozy. By learning the best insulation methods, you can turn your bathroom into a warm, energy-saving haven.

Understanding Bathroom Insulation Basics and Its Importance
Bathroom insulation is key to a well-designed home. It’s not just about keeping warm or cool. It also stops moisture from getting into your walls and saves energy.
Read also: The Best Insulation for Bathroom Walls
Insulation acts as a shield. It controls temperature and keeps moisture out. Its main goal is to make your bathroom comfortable and save energy.
How Bathroom Insulation Functions
Insulation works by creating a barrier. It:
- Blocks heat transfer between inside and outside
- Reduces moisture buildup
- Keeps temperatures steady
- Makes your home more comfortable
The Role of R-Value in Insulation Efficiency
R-value shows how well insulation works. It measures how well a material stops heat flow. The higher the R-value, the better it keeps temperatures steady.
| Insulation Type | R-Value per Inch | Best Use |
|---|---|---|
| Fiberglass | 2.2 – 2.7 | Standard wall cavities |
| Spray Foam | 3.5 – 6.5 | Tight spaces and air sealing |
| Rigid Foam Board | 4.0 – 6.0 | High moisture areas |
Impact on Energy Conservation
Good bathroom insulation saves energy. It cuts down on heating and cooling costs. This makes your home use less energy and lowers your bills.
Common Challenges in Bathroom Wall Insulation

Thinking about insulating bathroom walls? You’ll find it’s not as simple as other insulation jobs. Bathroom walls deal with extreme conditions that standard insulation can’t handle.
The main hurdles in insulating bathroom walls are:
- High moisture levels that can lead to mold growth
- Significant temperature fluctuations
- Risk of water damage to insulation materials
- Potential structural integrity issues
Moisture is the biggest challenge in insulating bathroom walls. Standard insulation materials can quickly break down in humid conditions. Fiberglass or mineral wool insulation can soak up water, creating a perfect spot for mold and mildew.
To stop moisture from getting in, you need special insulation. Closed-cell spray foam or rigid foam boards are better at keeping water out. They create a strong barrier that standard insulation can’t match, keeping your bathroom walls dry and safe.
Temperature changes are another big challenge. Bathrooms see fast heat and humidity changes during showers. This can make traditional insulation expand and contract, creating gaps. These gaps can make insulation less effective and lead to energy waste.
Choosing the right insulation for bathroom walls requires careful thought. It’s important to consider these unique conditions. Getting a professional’s advice can help you pick the best insulation for your needs.
Read also: What is Cellulose Insulation Made of?
Best Insulation for Bathroom Walls: Top Materials Guide
Choosing the right insulation for bathroom walls is key for comfort, energy savings, and keeping moisture out. Each material has its own benefits. Knowing these helps homeowners pick the best foam insulation and spray foam for their bathroom.
Looking at insulation options, some materials are better for bathrooms. Each type of spray foam and insulation has its own perks for your bathroom project.
Fiberglass Insulation Options
Fiberglass is a common pick for bathroom walls because it’s cheap and easy to find. But, it needs to be installed right to avoid moisture problems.
- Cost-effective insulation solution
- Widely available in most home improvement stores
- Requires vapor barrier for moisture protection
- Moderate R-value performance
Spray Foam Solutions
Spray foam insulation is top-notch for bathroom walls. It expands and seals gaps well, making it great for keeping moisture out.
- Exceptional air and moisture sealing capabilities
- High R-value per inch of thickness
- Prevents mold and mildew growth
- Provides excellent thermal performance
Rigid Foam Board Applications
Rigid foam boards are a great choice for bathroom insulation, even in wet areas.
| Foam Board Type | R-Value | Moisture Resistance |
|---|---|---|
| XPS (Extruded Polystyrene) | R-5 per inch | Excellent |
| Polyisocyanurate | R-6.5 per inch | Very Good |
| Expanded Polystyrene | R-4 per inch | Good |
By looking at these insulation options, you can make your bathroom comfy, energy-smart, and safe from moisture and temperature changes.
Moisture Control and Vapor Barriers in Bathroom Insulation

Keeping your bathroom walls dry is vital for a healthy home. Water-resistant materials help stop moisture from getting into your walls. Vapor barriers are a strong defense against water damage.
It’s important to know about the main types of vapor barriers. Each material has its own strengths in fighting moisture:
- Polyethylene sheets
- Kraft paper-faced insulation
- Foil-backed drywall
- Specialized bathroom wall membranes
When picking a vapor barrier, think about these key points:
| Barrier Type | Moisture Resistance | Cost | Installation Difficulty |
|---|---|---|---|
| Polyethylene | High | Low | Easy |
| Kraft Paper | Medium | Medium | Moderate |
| Specialized Membrane | Very High | High | Complex |
Installing vapor barriers right is essential to keep your bathroom walls dry. A pro can make sure your walls stay safe from water and mold. Using top-notch barriers helps your bathroom last longer.
Interior Bathroom Wall Insulation Techniques
Insulating your bathroom walls is key to saving energy and staying cozy. I’ll show you how to do it right, making your bathroom more comfortable and energy-efficient.
Before starting, make sure your bathroom walls are ready. It’s vital to control moisture first. Check for any water damage or leaks.
Step-by-Step Installation Process
- Inspect and repair any existing wall damage
- Clean and dry the interior bathroom walls completely
- Remove existing wall coverings or drywall if necessary
- Check for any electrical or plumbing considerations
- Measure the wall cavities accurately
Essential Tools and Materials
For a successful insulation project, you’ll need a few important items:
- Protective safety gear (goggles, gloves, dust mask)
- Measuring tape
- Utility knife
- Insulation material (spray foam or rigid foam board)
- Caulk and sealant
- Vapor barrier
Safety Considerations
When insulating your bathroom walls, safety comes first. Wear the right gear and make sure the area is well-ventilated. Always turn off electrical sources and be careful when handling insulation materials.
Installing insulation correctly can greatly improve your home’s energy use and prevent moisture problems. Take your time, follow each step carefully, and seek help if needed.
Exterior Bathroom Wall Insulation Methods
Protecting bathroom walls from the outside is key. Exterior insulation keeps your home warm and stops water damage.
Choosing the right insulation involves several factors:
- Climate conditions in your region
- Existing wall construction materials
- Budget constraints
- Long-term performance expectations
There are many insulation methods for bathroom walls. It’s important to find the best one for your home.
| Insulation Type | Effectiveness | Cost Range | Best Used For |
|---|---|---|---|
| Rigid Foam Boards | High | $1.50-$3/sq ft | Cold climates, moisture-prone areas |
| Spray Foam | Very High | $2-$4/sq ft | Comprehensive coverage, air sealing |
| Fiberglass Batts | Moderate | $0.50-$1.50/sq ft | Budget-friendly installations |
Installing insulation needs careful planning. A pro can help choose the best method for your home.
It’s wise to talk to a local insulation expert. They know local building codes and can give advice tailored to your needs.
Cost Analysis and ROI of Bathroom Insulation
Adding insulation to your bathroom is a smart move. It boosts your home’s energy use and saves money over time. Knowing the costs helps you choose wisely for your home.
Material Cost Comparison
Insulation materials vary in price and how well they work. Here’s a look at the most common types:
- Fiberglass batts: Usually the cheapest
- Spray foam: Costs more upfront but saves more energy
- Rigid foam boards: A middle ground in price and performance
Long-term Energy Savings
Good insulation in your bathroom can save a lot of energy. Here’s how much you might save each year:
| Insulation Type | Annual Energy Savings | Estimated Payback Period |
|---|---|---|
| Fiberglass Insulation | $100-$200 | 3-5 years |
| Spray Foam Insulation | $250-$400 | 2-4 years |
| Rigid Foam Boards | $150-$300 | 3-5 years |
Installation Expenses
How much you pay for installation depends on your bathroom. Get quotes from pros to know the cost. DIY can save money, but pros ensure best results and moisture control.
- Professional installation: $1,500-$5,000
- DIY installation: $500-$1,500 for materials
- Costs can change based on:
- Bathroom size
- Wall condition
- Installation complexity
Though it costs upfront, insulation pays off in the long run. It’s a smart choice for any homeowner.
Professional vs DIY Installation Considerations
Homeowners must decide whether to do the bathroom wall insulation themselves or hire a pro. DIY might seem cheaper, but insulation is complex. It needs careful thought.
Experts save time and avoid mistakes. They know how to handle moisture and pick the right materials. They spot problems like water damage or mold that you might miss.
- DIY Challenges:
- Requires specialized tools
- Demands technical knowledge
- Risk of improper installation
- Professional Benefits:
- Guaranteed quality work
- Warranty protection
- Expert moisture control
While you can rent a machine for DIY, many choose pros. This is true for complex layouts or older homes.
| Installation Type | Average Cost | Skill Level Required |
|---|---|---|
| DIY Insulation | $200-$500 | Advanced |
| Professional Installation | $500-$1,500 | Expert |
Think about your skills, time, and money before choosing. DIY might be cheaper, but pros ensure better insulation and energy savings.
Conclusion
Choosing the right insulation for bathroom walls is more than just keeping it warm. It’s a smart move for your home’s comfort and energy use. We’ve covered the key points, from R-values to the best materials like fiberglass and spray foam.
Insulation in your bathroom is key to avoiding moisture damage and saving on energy bills. It makes your home more comfortable. You can choose to hire a pro or do it yourself, but make sure it’s a choice that fits your budget and needs.
Remember, there’s no single best insulation for every bathroom. Your home’s specific needs, like the climate and layout, will guide your choice. Take your time to figure out what’s best for you. If needed, get advice from insulation experts who can help tailor a solution for you.
By focusing on insulation for your bathroom walls, you’re making your whole home more energy-efficient and cozy. Begin your insulation project today. You’ll see the benefits right away and for years to come in your energy-smart bathroom.


