Cold floors can be a big problem for homeowners. They make your home feel chilly and increase heating costs. This can be both uncomfortable and expensive.
I’ll show you how to insulate a floor from the top. This simple solution can make your home warmer and more comfortable. Plus, it can help lower your energy bills each month.
Understanding Floor Insulation Basics
Floor insulation is key to an energy-efficient home, yet many overlook it. I’ve dealt with cold floors and know how important it is. The right insulation can greatly improve your home’s comfort and energy use.
Basements and ground floors lose a lot of heat. They can lose up to 25 percent of your home’s heat. Learning to insulate your wood floor from the top can really help your home stay warm.
Types of Floor Insulation Materials
Choosing the right insulation material is vital. Here are the most common ones:
- Fiberglass batts – affordable and widely available
- Rigid foam boards – excellent for high-moisture areas
- Spray foam – provides superior air sealing
- Mineral wool – offers excellent sound and thermal insulation
Benefits of Proper Floor Insulation
Floor insulation has many benefits:
- Lower energy bills
- Better home comfort
- Better temperature control
- Protection against moisture damage
Heat Loss Through Floors
Understanding heat transfer is key to good insulation. Uninsulated floors let cold air in and warm air out. Proper insulation makes your home more comfortable and consistent.
The best insulation for your floor depends on your home, climate, and current conditions. A professional can help find the best solution for you.
Essential Tools and Materials Needed
Getting the right tools and materials is key to insulating a floor well. I’ll show you what you need for a job that looks professional. This is true whether you’re insulating a house or shed floor.

Cutting and Measuring Tools
- Sharp utility knife or specialized insulation cutting knife
- Measuring tape
- Straightedge or carpenter’s square
- Multifoil scissors
Installation Equipment
- Staple gun with appropriate staples
- Protective work gloves
- Safety glasses
- Dust mask
For insulating a shed floor from the top, pick materials that keep heat in well. Here are some top picks:
| Insulation Type | Best Used For | Recommended Thickness |
|---|---|---|
| Fiberglass Batts | Standard floor spaces | 3-6 inches |
| Rigid Foam Boards | Moisture-prone areas | 1-2 inches |
| Spray Foam | Hard-to-reach spaces | 2-3 inches |
Remember, buy 10% more material than you think you’ll need. This helps with cuts, waste, and any mistakes. Being prepared makes the job easier and more efficient.
How to Insulate a Floor From The Top
Insulating a floor above a garage or between floors needs careful planning. I’ll guide you through the key steps. This will help make your home more energy-efficient and comfortable.
Before starting, it’s important to know how to insulate between floors well. Good preparation is key to the success of your insulation project.
Read also: R49 Batt Insulation
Preparing the Work Area
First, clear out the space completely. Take out all furniture, rugs, and loose items. This makes your workspace clean and organized, helping the insulation process.
- Clear the entire floor area
- Remove electrical outlet covers
- Ensure good ventilation
- Gather all necessary tools and materials
Measuring and Planning
Accurate measurement is essential when insulating a floor above a garage. Use a laser measuring tool for precise measurements. Calculate the total square footage and add 10% extra for cuts and waste.
| Measurement Step | Details |
|---|---|
| Length Measurement | Measure from wall to wall |
| Width Measurement | Measure perpendicular to length |
| Extra Material | Add 10% to total square footage |
Safety Considerations
Always prioritize safety when insulating floors. Wear safety glasses, work gloves, and a dust mask. Make sure you have good lighting and a stable ladder if needed.
- Wear protective safety equipment
- Check for electrical hazards
- Ensure proper ventilation
- Keep a first aid kit nearby
By following these steps, you’ll successfully insulate your floor. This will improve your home’s energy efficiency.
Selecting the Right Insulation Material
Choosing the right insulation for your floor is important. You need to think about different materials and what your home needs. When insulating an old house, look at various options for the best efficiency and protection.
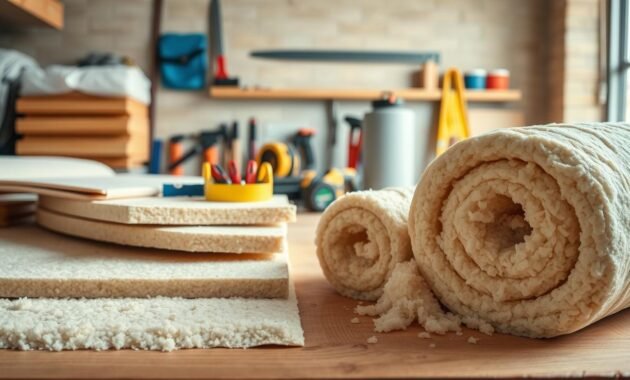
Here are some top insulation materials for different floors and homes:
- Rigid Mineral Wool Boards: Excellent for moisture resistance
- High-Density Polystyrene (Type IV): Superior thermal performance
- Polyurethane/Polyisocyanurate Boards: Highest R-value per inch
Older homes have special insulation needs. They often have uneven floors and moisture issues. You’ll need to use special methods to handle these problems.
| Insulation Type | R-Value | Cost per Sq Ft | Best For |
|---|---|---|---|
| Mineral Wool | 4.3 per inch | $1.50 | Moisture-prone areas |
| Polystyrene | 5.0 per inch | $2.00 | High-traffic spaces |
| Polyisocyanurate | 6.0 per inch | $2.50 | Maximum insulation |
Think about your home’s age, floor condition, budget, and climate when choosing insulation. Each material has its own benefits. Choose the one that fits your needs best for the best results.
Preparation Steps Before Installation
Before you start insulating your floor, make sure your space is ready. Good preparation is key to a successful insulation job. I’ll show you the important steps to follow.
Insulating your house’s floor needs careful planning. The prep work is vital to avoid problems later and get the best insulation.
Clearing and Cleaning the Area
First, clear the area where you’ll install the insulation. Take out all furniture and debris. A clean area is important for a good insulation job.
- Remove all items from the floor
- Sweep and vacuum thoroughly
- Check for any existing damage or debris
Moisture Assessment
Moisture is a big problem for floor insulation. It’s smart to check for moisture before starting. Use a moisture meter to find any damp spots.
- Check for water stains or discoloration
- Use a professional moisture meter
- Identify any moisture sources
Structural Inspection
It’s important to check the floor’s structure before insulating. Look for any damage or weakness that needs fixing first.
- Inspect floor joists for damage
- Check for any signs of wood rot
- Make sure the structure is sound before you start
Pro tip: Small damp spots can be fixed from inside. But big moisture problems need outside help. If you find serious issues, get a pro’s advice before you start.
Installation Process for Floor Insulation
Learning to insulate a floor from the top needs careful steps. I’ll guide you through the essential steps for a top-notch insulation job on your wood floor.
To begin, lay out your insulation material across the floor. Aim for a continuous layer to block heat loss and boost energy efficiency.
- Measure the floor area precisely
- Cut insulation materials to fit exactly
- Ensure tight connections between insulation panels
- Check for any gaps or possible air leaks
Choose high-quality insulation like EcoTec FloorFoam. Space staples about 300mm apart for a secure fit. Focus on joining sections well, ensuring a tight seal.
| Insulation Material | Recommended Spacing | Installation Difficulty |
|---|---|---|
| EcoTec FloorFoam | 300mm intervals | Moderate |
| Fiberglass Batts | 250mm intervals | Easy |
| Rigid Foam Boards | 400mm intervals | Challenging |
Insulation work demands safety. Wear gloves, safety glasses, and a dust mask. Work slowly to ensure a smooth, heat-blocking layer.
Sealing and Vapor Barrier Installation
Learning how to insulate between floors starts with sealing and installing a vapor barrier. These steps are key to stopping air leaks and moisture. They keep your floor energy-efficient and safe.
I’ll show you how to insulate a floor well. We’ll focus on finding air leaks and putting in a good vapor barrier.
Common Air Leakage Points
Air leaks can hurt your floor’s insulation. Look out for:
- Gaps around electrical outlets
- Spaces between floor joists
- Cracks near baseboards
- Openings around pipe and wire penetrations
Proper Vapor Barrier Placement
Putting in a vapor barrier is essential. Use a top-notch, continuous membrane for the whole floor. It should be:
- Completely sealed at all seams
- Free from punctures or tears
- On the warm side of the insulation
Pro tip: Use Thermaseal foil tape for all joints and edges. It stops moisture and keeps your insulation dry and working well.
Finishing Touches and Floor Coverage
After insulating your shed or old house floor, you’re almost done. The right floor covering can greatly improve comfort and energy efficiency.
Choosing the right floor covering is key when insulating a shed floor from the top. I’ll guide you through the best options.
- Carpet: Use an underlay for extra comfort and insulation
- Laminate: Can be installed directly on insulation
- Hardwood: Requires careful installation to maintain insulation effectiveness
For old house floors, here are some top floor covering picks:
| Flooring Type | Compatibility | Recommended Underlayment |
|---|---|---|
| Carpet | Excellent | Foam or felt underlay |
| Laminate | Very Good | Thin foam backing |
| Hardwood | Good | Specialized wood floor underlayment |
Always check the manufacturer’s guidelines for your flooring and insulation. This keeps both in top shape.
Remember a few things: let wooden floors acclimate properly, keep your vapor barrier in place, and consider a pro for installation if needed.
Conclusion
Insulating your house’s floor can make your living space more comfortable and energy-efficient. I’ve shown you how to insulate a floor above a garage. Now, let’s talk about the big benefits you’ll see.
Read also: What Is the Cheapest Way to Insulate Garage Ceiling?
Insulating your floor is a smart move. It might seem hard, but the benefits are worth it. You’ll save on energy bills, control the temperature better, and improve your home’s performance.
Keeping your insulation in good shape is important. Check it often for damage or moisture. If you’re unsure or face tough issues, get help from a pro.
Your effort to improve your home’s insulation shows you care about comfort and efficiency. With the right steps, your floor insulation will pay off for many years.
