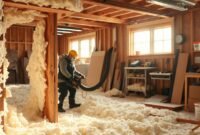
Is your garage freezing cold in winter? Many people face cold temperatures and high energy bills because of poor insulation. This can be expensive and really annoying.
Insulating your garage ceiling is a smart move. It creates a barrier that saves energy and makes your space more comfortable. This guide will show you how to do it like a pro.
Ready to make your garage warm and energy-efficient? It’s time to turn your cold garage into a cozy, money-saving space!
Benefits of Insulating Your Garage Ceiling
Turning your garage into a cozy and energy-saving space starts with one key step: insulating the ceiling. This simple change brings many benefits that can greatly enhance your home’s performance and your life quality.

By insulating your garage ceiling, you’re not just adding a layer. You’re creating a barrier that offers impressive benefits:
- Substantial energy cost reduction
- Enhanced temperature control
- Effective noise reduction
- Protection for stored belongings
Energy Cost Reduction
I’ve seen how proper insulation can cut down energy bills. It creates a thermal barrier, making your HVAC system work less. This leads to lower monthly bills. Homeowners often save 10-20% on heating and cooling costs after installing garage ceiling insulation.
Temperature Control Benefits
Imagine a garage that’s not cold in winter or hot in summer. Insulation acts as a shield, keeping the temperature steady. This makes your garage a usable space all year, whether for projects or storage.
Noise Reduction Advantages
Noise can disrupt, even in attached garages. Insulating your ceiling helps block outside sounds, making it quieter. You’ll enjoy more peace and quiet, whether it’s street noise or neighborhood activities.
Essential Tools and Materials for Ceiling Insulation
Insulating your garage ceiling can be a breeze with the right tools. I’ll show you what you need for a job well done.
First, make sure you have these important tools and materials:
- Utility knife with sharp replacement blades
- Sturdy extension ladder
- Measuring tape
- Protective safety gear (goggles, gloves, dust mask)
- Vapor barrier materials
- Insulation rolls or batts
- Staple gun with appropriate staples
Your vapor barrier is key to stopping moisture. Choose a top-notch polyethylene sheet. It keeps condensation and mold away.
For certain insulation types, you might need more gear. Spray foam, for instance, needs a spray gun and extra safety gear. Always follow the manufacturer’s guide for the best results.
Pro tip: Spend on quality tools and materials from the start. Cheap stuff can ruin your project and cost you more later.
Read also: How to Insulate a Garage Ceiling Rafters and Its Benefits
Understanding R-Values and Insulation Types
Insulating your garage right can save you money and make it more comfortable. R-values show how well insulation stops heat from moving and keeps temperatures right.
Recommended R-Values for Garage Ceilings
I suggest aiming for an R-value of R30 to R40 for garage ceilings. This range offers great thermal protection. It helps keep your garage space well-insulated and cuts down on energy loss. The higher the R-value, the better it blocks heat.
Different Types of Insulation Materials
- Fiberglass Batts: Budget-friendly and easy to install
- Cellulose: Eco-friendly option made from recycled materials
- Rigid Foam: High R-value in a compact design
- Spray Foam: Superior air sealing with excellent insulation properties
Cost Comparison of Insulation Options
Choosing the right insulation depends on your budget and needs. I’ll compare costs and benefits to guide your choice.
| Insulation Type | R-Value per Inch | Average Cost per Sq Ft | Lifespan |
|---|---|---|---|
| Fiberglass Batts | R-3.2 | $0.30 – $0.50 | 10-15 years |
| Cellulose | R-3.6 | $0.50 – $0.75 | 15-20 years |
| Rigid Foam | R-5 to R-6 | $0.75 – $1.50 | 20-30 years |
| Spray Foam | R-6 to R-7 | $1.50 – $3.00 | 20+ years |
Air sealing is key when insulating your garage. Each insulation type has its own benefits. Think about your needs, budget, and long-term goals when choosing.
Safety Precautions and Preparation Steps

Before starting your garage insulation project, safety is key. Proper preparation is vital for a successful job. I’ll guide you through the essential steps to ensure a safe and smooth process.
Personal Protective Equipment (PPE)
Insulating your garage ceiling requires the right gear. Here’s what you need:
- Safety goggles to protect your eyes from insulation fibers
- Respirator mask to prevent inhaling harmful particles
- Thick work gloves to protect your hands
- Long-sleeved clothing to minimize skin contact
- Hard hat for overhead work protection
Preparation Checklist
Preparing your garage for insulation is important. Follow these steps for success:
- Clear out all items from the garage ceiling area
- Inspect for any existing water damage or leaks
- Remove old or damaged existing insulation
- Seal any visible gaps or cracks in the ceiling
- Ensure proper ventilation before starting the project
Workspace Safety
Creating a safe workspace is critical. Work during daylight hours for better visibility. Use a stable ladder and have a helper nearby. Open windows and doors for ventilation and consider fans to reduce dust.
By following these safety tips and preparation steps, you’ll be ready to tackle your garage insulation project confidently and safely.
How to Insulate a Garage Ceiling
Improving your garage’s comfort and energy use starts with insulating the ceiling. I’ll guide you through the key steps to insulate your garage ceiling well. This ensures it works effectively and lasts long.
Measuring and Planning Your Insulation Project
Getting started with insulating your garage ceiling needs precise measurements. Here’s what to do first:
- Measure the total ceiling area accurately
- Calculate your garage’s square footage
- Determine how thick your insulation should be
- Check the current state of your ceiling
Installing Vapor Barriers
A vapor barrier is key for ceiling insulation. It keeps moisture out and protects your insulation. Here’s how to do it:
- Choose the right vapor barrier material
- Clean the ceiling well
- Cut the vapor barrier to fit perfectly
- Use the right fasteners to secure it
Proper Installation Techniques
Insulation needs to be installed carefully. I’ve compared different methods to help you pick the best one:
| Insulation Type | Installation Difficulty | Cost Efficiency |
|---|---|---|
| Fiberglass Batts | Easy | Low |
| Spray Foam | Moderate | High |
| Blown-In Cellulose | Complex | Medium |
Each insulation method has its own needs. Take your time, follow the instructions, and ask for help if needed.
Air Sealing Techniques for Maximum Efficiency
Air sealing is key to a cozy and energy-saving garage. I’ve found that it boosts insulation and cuts down on energy loss. It’s a game-changer for your home.
Air sealing does more than just block drafts. It creates a solid barrier that keeps your garage’s temperature steady. This also lowers your energy bills. Focus on these key spots:
- Gaps around windows and door frames
- Ceiling and wall intersections
- Electrical outlet openings
- Pipe and wire penetrations
For air sealing, I rely on caulk and expanding foam. Use silicone caulk for cracks under 1/4 inch. For bigger gaps, expanding foam is the way to go. It seals well and stops air leaks.
Before you start, make sure the surfaces are clean and dry. This ensures the sealant sticks well. Take your time for the best results.
Good air sealing turns your garage into a cozy, draft-free space. Spend a few hours on this, and you’ll save energy and control the temperature better for years.
Common Mistakes to Avoid During Installation
Small errors can ruin your garage insulation project. I’ve seen many DIY fans make mistakes that cut down on insulation and waste time and money.
Getting ready is key when adding a vapor barrier and insulating your garage ceiling. Here are some big mistakes to avoid in your project.
Spacing and Coverage Challenges
- Leaving small gaps between insulation panels
- Uneven coverage of ceiling areas
- Failing to cut insulation precisely around obstacles
- Overlooking tight corners and edges
Moisture Control Complications
Moisture can ruin your insulation fast. Make sure your vapor barrier is installed right to avoid water damage and mold.
- Skipping vapor barrier installation
- Improper sealing of barrier edges
- Using incorrect moisture barrier materials
- Neglecting existing moisture issues
Ventilation Considerations
Good airflow is key for garage ceiling insulation. Bad ventilation can cause condensation, lower insulation, and harm your structure.
- Blocking existing ventilation points
- Ignoring possible condensation risks
- Not creating enough air circulation
- Overlooking humidity control
Knowing and avoiding these mistakes will help you get a better and longer-lasting garage ceiling insulation.
Professional Tips for Better Insulation Performance

Insulating your garage ceiling is more than just basic steps. I’ve picked up pro tips that boost your insulation, even in a room above the garage.
Start with a smart choice of insulation materials. Each type is best for different needs. Here’s what I suggest:
- Use spray foam for critical air sealing points
- Combine fiberglass batts for full coverage
- Apply radiant barriers to reflect heat well
- Make sure to ventilate to avoid moisture
When you’re insulating a garage ceiling with a room on top, focus on R-value and soundproofing. The right insulation can change your space. It cuts energy costs and reduces noise.
| Insulation Type | Best Use | R-Value Range |
|---|---|---|
| Spray Foam | Air Sealing | 3.5-6.5 per inch |
| Fiberglass Batts | Large Area Coverage | 2.2-4.3 per inch |
| Rigid Foam Board | High Thermal Resistance | 4-6.5 per inch |
Pro tip: Fix air leaks around electrical boxes, ductwork, and windows. These small issues can greatly affect your insulation in the room above the garage.
Maintaining Your Garage Ceiling Insulation
Keeping your garage ceiling insulation in good shape is key for its long-term performance. It helps save energy and keeps your space comfortable. Regular care can make your insulation last longer and keep your home up to code.
Regular checks are essential for maintaining your garage ceiling. Here’s how to keep your insulation in great condition:
- Do visual checks every 3-4 months
- Look for moisture or damage signs
- Seal small gaps or cracks right away
- Make sure there’s good air flow around the insulation
Getting professional help is also important for your insulation. I suggest getting a full check-up by an expert every two years. They can spot problems you might miss and make sure you’re following the latest building codes.
Remember these key maintenance tips:
- Watch for wear or compression signs
- Check for pest problems
- Make sure vapor barriers are intact
- Deal with moisture issues quickly
With the right care, your garage ceiling insulation can last up to 20 years. This means a small investment in maintenance can save you a lot of money on energy and repairs later on.
Read also: How to Insulate a Garage Ceiling Like a Pro
Don’t overlook this important investment in your home. A well-kept insulation system keeps your garage cozy, saves energy, and protects against weather and pests.
Conclusion
I’ve shown you how to make your garage both comfy and energy-saving. This project is more than just keeping it warm or cool. It’s a smart choice for your home’s performance and your comfort.
Choosing the right insulation, knowing about R-values, and installing it correctly turned your garage into a cozy, controlled space. The savings on energy bills are a big plus. It also boosts your home’s value.
Good insulation is more than just adding materials. It’s about sealing air leaks, handling moisture, and keeping the temperature steady. Whether for cars, DIY projects, or a more useful space, your garage is now a smart upgrade.
Your hard work shows that anyone can get great results with the right info and effort. Enjoy your new garage and the comfort it brings!


