Cold floors can really ruin your day, making your home less cozy and more expensive to heat. Without insulation, concrete floors suck the warmth out of your space. This makes your rooms feel cold and forces your heating to work too hard.
I’m here to show you how to insulate a concrete floor the right way. With the right insulation, your cold floor can become warm and energy-saving. This will make your home more comfortable and lower your energy bills.
Understanding the Importance of Concrete Floor Insulation
Keeping your home warm starts with knowing how important concrete floor insulation is. Your floor is not just a surface. It’s a key area where heat can escape if not insulated.
Insulating your floor is key to a cozy and energy-saving home. Without insulation, your floor can let heat out and cold air in. This makes your home less comfortable and less energy-efficient.

Energy Loss Through Uninsulated Floors
Did you know up to 15% of your home’s heat can escape through an uninsulated floor? This loss means higher energy bills and less comfort. Thermal barriers for concrete floors are a vital fix for this issue.
- Up to 15% heat loss through uninsulated floors
- Potential annual energy savings of £60 – £100
- Improved home temperature regulation
Impact on Home Comfort and Energy Bills
Good concrete floor insulation does more than save money. It makes your home more comfortable. It helps keep the temperature steady, cuts down on drafts, and makes your home feel cozier.
Read also: Why is Rubber a Good Insulator?
Long-term Cost Benefits of Proper Insulation
Insulating your floor might seem expensive at first. But the long-term savings are worth it. It cuts down on heating and cooling costs, saving you money over time.
Learning about floor insulation is the first step to a more energy-efficient and cozy home.
Benefits of Insulating Your Concrete Floor
Insulating concrete floors is a big step in home improvement. It brings many benefits. Using top-notch insulation materials can change your living area in amazing ways.
Let’s explore the main advantages of insulating basement concrete floors and other surfaces:
- Energy Efficiency Boost: Good insulation cuts down heat loss. This can lower your energy bills by up to 20%.
- Enhanced Comfort: Insulation makes floors warm and cozy. It keeps your living areas comfortable.
- Moisture Control: Top insulation stops moisture buildup. This protects your home from water damage and mold.
- Noise Reduction: Insulation blocks sound. It reduces noise between floors and from outside.
For homeowners, insulating concrete floors is more than a project. It’s an investment in comfort, saving energy, and protecting your home. The right insulation can greatly improve your home’s temperature and feel.
Choosing the best insulation materials is not just for now. It’s for a more efficient and comfortable home for years. Whether it’s a basement, ground floor, or any concrete area, insulation is essential for a perfect indoor climate.
Essential Materials and Tools for Concrete Floor Insulation
Getting ready for a concrete floor insulation project needs careful planning and the right tools. I’ll show you the key materials and tools for a successful installation.
When working on concrete floor insulation, picking the right materials and tools is key. Rigid foam insulation is a popular choice for its great thermal performance and moisture resistance.
Insulation Materials Overview
- Rigid foam insulation panels
- Exterior grade plywood for subfloor preparation
- Vapor barrier sheets
- Insulation adhesive
- Foam sealant
Required Tools and Equipment
- Tape measure
- Utility knife
- Caulking gun
- Straight edge
- Protective saw (for cutting rigid foam insulation)
Safety Equipment Checklist
- Safety glasses
- Work gloves
- Dust mask
- Knee pads
- Protective clothing
Material costs for rigid foam insulation for concrete vary from $5 to $25 per square meter. It’s wise to invest in high-quality exterior grade plywood and insulation for lasting protection and energy savings.
Pro tip: Always check local building codes and manufacturer guidelines before starting your insulation project. The right preparation and materials can greatly improve your floor’s performance and your home’s comfort.
How to Insulate a Concrete Floor
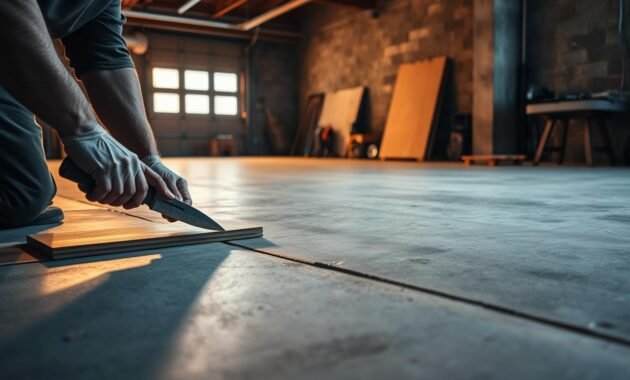
Insulating a concrete floor is key to an energy-efficient home. I’ve done this project many times. Let me guide you through insulating a concrete floor well.
Before you start, get ready. Make sure the floor is clean and dry. Here’s what you need to do:
- Clean the concrete surface well, removing any debris or dust
- Check the floor for cracks or damage that need fixing
- Measure the area to figure out how much insulation you’ll need
- Get all the tools and safety gear you’ll need
The main steps for insulating a concrete floor include:
- Put down a damp-proof membrane to stop moisture
- Install rigid insulation boards carefully
- Seal all gaps between insulation panels
- Add insulation strips around the edges
- Put on a final screed layer
Tip for good insulation: Make sure the insulation layer is continuous with few gaps. This boosts your energy efficiency and cuts down on heat loss.
Insulating a concrete floor might look hard, but with careful planning and execution, you can get great results. Take your time, follow each step carefully, and ask local experts for help if you need it.
Types of Insulation Materials for Concrete Floors
Choosing the right insulation for concrete floors is key for energy efficiency and comfort. As a homeowner, I’ve found that picking the best insulation can greatly improve your home’s energy use and costs.
There are three main materials for rigid foam insulation for concrete floors. Each has its own benefits for different needs.
Expanded Polystyrene (EPS) Insulation
EPS is a cost-effective choice for concrete floor insulation. It’s known for:
- Being lightweight and easy to install
- Having a compressive strength of 70 kPa
- Being good at resisting moisture
- Being affordable for many homeowners
Extruded Polystyrene (XPS) Insulation
XPS is top-notch for tough insulation jobs. It’s known for:
- Having the highest compressive strength at 300 kPa
- Being a strong moisture barrier
- Being great for use below grade
- Being a bit pricier than EPS
Polyisocyanurate (PIR) Boards
PIR boards are the premium option for concrete floor insulation:
- Having the highest R-value per inch
- Having a compressive strength of 150 kPa
- Offering excellent thermal performance
- Being fire-resistant
| Insulation Type | Compressive Strength | Cost Efficiency | Moisture Resistance |
|---|---|---|---|
| EPS | 70 kPa | High | Good |
| XPS | 300 kPa | Medium | Excellent |
| PIR | 150 kPa | Low | Very Good |
What you need for your project will decide the best insulation. Think about your budget, moisture levels, and how well it will keep your home warm or cool.
Above vs Below Slab Insulation Methods
Homeowners have two main ways to insulate basement concrete floors: above-slab and below-slab insulation. Knowing the differences helps you choose the best option for your home’s energy use and comfort.
Above-slab insulation is quicker and less invasive. It involves putting insulation on top of the concrete slab. Its benefits include:
- Minimal disruption to existing structures
- Easier installation process
- Lower labor costs
Below-slab insulation, though, offers better thermal performance. It involves placing insulation under the slab before pouring concrete. Its advantages are:
- Better overall thermal protection
- More consistent temperature control
- Enhanced moisture barrier
But, above-slab insulation raises the floor, affecting room size. Below-slab insulation requires more work but offers better thermal stability. It’s wise to get a professional’s opinion to find the best insulation for your basement.
Read also: Attaching the Rigid Foam Insulation Between Studs
The choice depends on your budget, floor structure, and insulation goals. Each method has its strengths, and the best one varies by home.
Proper Thickness and R-Value Requirements
When planning thermal barriers for concrete floors, knowing about thickness and R-value is key. Different insulation options for concrete slabs depend on several important factors. These factors affect your home’s energy use and comfort.
Choosing the right insulation is more than just picking a material. You must consider various aspects. This ensures your concrete floor meets energy standards and offers top thermal protection.
Understanding U-Values
U-values show how well insulation stops heat transfer. In the United States, lower U-values mean better insulation. Aim for a U-value between 0.20 and 0.30 W/m²K for the best thermal efficiency.
- Lower U-values mean better insulation
- Ideal range: 0.20-0.30 W/m²K
- Directly impacts energy conservation
Regional Building Code Requirements
Building codes differ by region, so checking local requirements is vital. Each climate zone has specific standards for thermal barriers. Homeowners must follow these standards.
| Climate Zone | Minimum R-Value | Recommended Insulation Thickness |
|---|---|---|
| Northern Regions | R-10 to R-15 | 3-4 inches |
| Southern Regions | R-5 to R-10 | 2-3 inches |
Understanding these requirements helps ensure your concrete floor insulation meets energy standards and local building codes.
Read also: Recommended Insulation for Flat Roof without Attic
Common Mistakes to Avoid During Installation
When you’re doing diy concrete floor insulation, it’s just as important to know what not to do. I’ve seen many homeowners make big mistakes. These mistakes can hurt the floor’s performance and energy use.
Insulating a concrete floor needs careful attention. Common mistakes can cause energy loss, moisture issues, and less comfort at home.
- Skipping moisture barrier installation
- Using incorrect insulation thickness
- Neglecting proper gap and edge sealing
- Ignoring local building code requirements
- Choosing inappropriate insulation materials
Here are the most important errors to avoid in your concrete floor insulation project:
| Mistake | Potential Consequences | Prevention Strategy |
|---|---|---|
| Insufficient Moisture Barrier | Mold growth, structural damage | Use high-quality vapor barrier, ensure complete coverage |
| Inadequate Insulation Thickness | Higher energy bills, poor temperature control | Check local R-value recommendations, use proper insulation depth |
| Poor Sealing | Air leaks, reduced insulation effectiveness | Use quality sealants, carefully fill all gaps and joints |
My best tip for successful diy concrete floor insulation is to do your research, buy quality materials, and take your time. Rushing can lead to costly mistakes that will cost you more later.
Cost Analysis and ROI of Concrete Floor Insulation
Adding insulation to your concrete slab can save a lot of money over time. It’s important to understand the costs of insulation to make smart choices for your home.
When looking at the cost of insulation, consider several factors. The right choice can lower your energy bills and make your home more comfortable.
Material Costs Breakdown
Insulation materials have different prices and benefits. Here’s a look at what you might pay:
- Expanded Polystyrene (EPS): $1.50 – $3 per square foot
- Extruded Polystyrene (XPS): $2 – $4 per square foot
- Polyisocyanurate (PIR) Boards: $3 – $5 per square foot
Installation Expenses
Installation costs can add up. Getting the insulation right requires careful planning and execution.
| Installation Type | Cost per Square Foot | Total Cost Estimate |
|---|---|---|
| DIY Installation | $1 – $2 | $500 – $1,500 |
| Professional Installation | $3 – $7 | $1,500 – $4,000 |
Energy Savings Calculations
Good insulation can save a lot on energy. Homeowners often see savings in 3-5 years from lower heating and cooling costs.
- Average annual energy savings: 10-20%
- Potential cost reduction: $200 – $500 per year
- Long-term savings over 10 years: $2,000 – $5,000
Before choosing insulation, think about your needs, climate, and budget. While it might cost more upfront, the long-term savings are worth it for any homeowner.
Professional vs DIY Installation Considerations
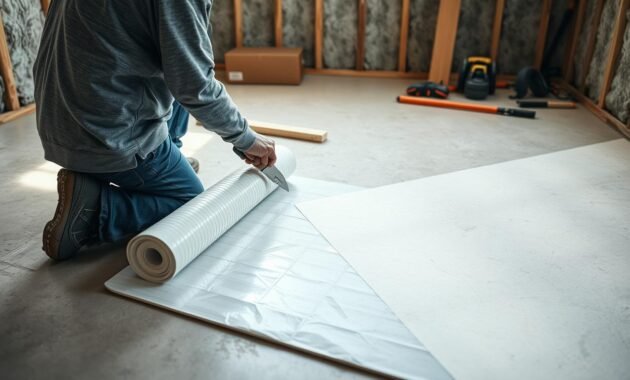
Choosing between professional and DIY concrete floor insulation is tough. It depends on several key factors. These factors affect your budget and the success of your project.
DIY concrete floor insulation can save you a lot of money. Homeowners might cut costs by 50-70% by doing it themselves. But, it needs specific skills and careful planning, which is more challenging for garage floors.
- DIY Advantages:
- Lower labor costs
- Complete project control
- Personal satisfaction
- Professional Installation Benefits:
- Guaranteed quality work
- Building code compliance
- Professional expertise
Professional installers are key for complex insulation jobs. They know local building rules and can handle moisture or structural issues. DIY folks might miss these problems.
| Consideration | DIY Approach | Professional Installation |
|---|---|---|
| Cost | Lower initial expense | Higher upfront investment |
| Skill Required | Moderate to Advanced | Professional Expertise |
| Time Investment | Significant personal time | Quick professional completion |
| Warranty | Limited or None | Comprehensive coverage |
For garage concrete floor insulation, check your skills first. If you’re good with construction and have the right tools, DIY might be for you. But, if you’re not sure, professional installation is safer and more reliable.
Conclusion
Insulating a concrete floor is more than a home improvement. It’s an investment in comfort and saving energy. I’ve shown you the key steps to insulate a concrete floor. These steps can greatly improve your living spaces.
Insulation is not just about keeping warm. It can cut down your energy bills and make your home more comfortable. It also increases your home’s value. Whether it’s a basement, garage, or ground-level floor, the right insulation can change cold, drafty areas into cozy ones.
Before starting, think about what you need, your local climate, and your home’s features. While DIY can save money, professional installation often gives better results. Quality insulation may cost more upfront but will save you money and make your home more comfortable for years.
With this guide, you’re ready to choose the best insulation for your concrete floor. Your home’s comfort and energy use will greatly improve.
