Are you fed up with high energy bills and uncomfortable temperatures inside? Metal roofs without insulation can make your home hot in summer and cold in winter. This constant change in temperature can be expensive and uncomfortable.
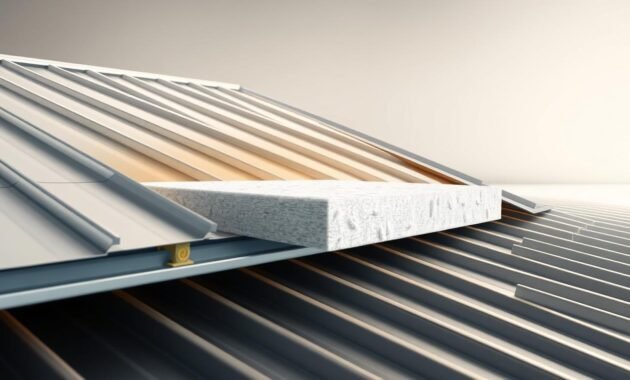
Rigid foam insulation under metal roofs is a great solution. I’ll show you how to install it to make your home more energy-efficient. By following my steps, you’ll create a barrier that keeps your home comfortable all year. This will also lower your heating and cooling costs a lot.
Let’s explore how to insulate a metal roof. This will help you achieve better home comfort and save on energy.

Understanding Metal Roof Insulation Basics
Metal roofs are gaining popularity for their energy-saving benefits. They offer special advantages for keeping your home warm in winter and cool in summer. Knowing how metal roof insulation works is key to saving energy and staying comfortable indoors.
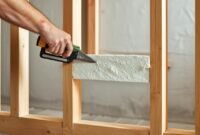
Read also: Attaching the Rigid Foam Insulation Between Studs
Do metal roofs insulate better? It depends on the insulation used. Metal roofs can cut down energy use with the right insulation. This leads to better energy efficiency.
Benefits of Insulating Metal Roofs
- Reduces heat transfer and maintains consistent indoor temperatures
- Lowers energy bills by minimizing heat gain and loss
- Prevents condensation and moisture-related issues
- Enhances overall building durability
Types of Rigid Foam Insulation
There are three main types of rigid foam insulation for metal roofs:
- Expanded Polystyrene (EPS): Most cost-effective option
- Extruded Polystyrene (XPS): Higher moisture resistance
- Polyisocyanurate: Highest R-value per inch of thickness
R-Value Considerations
R-value shows how well insulation keeps heat out. Your area’s climate and roof needs decide the best R-value. Colder places need higher R-values for better energy use and comfort.
Choosing the right insulation turns your metal roof into a big energy saver. By learning these basics, you can make smart choices for your roof’s insulation.
Essential Tools and Materials for Installation
Before you start installing styrofoam insulation under metal roofing, you need to prepare well. You’ll also need the right tools and materials. Let’s go over what you’ll need for a successful insulation project.
First, gather these important tools for a smooth rigid boards installation:
- Measuring tape for precise dimensions
- Utility knife or specialized cutting saw
- Straight edge or T-square for accurate cuts
- Power drill and screwdriver set
- Caulking gun for sealing
Remember, safety is key when working with styrofoam insulation under metal roofing. Don’t forget these protective items:
- Safety goggles
- Work gloves
- Dust mask
- Hard hat
For your rigid boards installation, you’ll need specific materials:
- Foam board insulation panels
- Corrosion-resistant screws with washers
- Construction adhesive
- Aluminum tape for sealing joints
- High-quality caulk or spray foam
Choosing the right rigid boards is key for good metal roof insulation. Look for high-density foam panels that block moisture and keep warm. It’s a good idea to talk to a local building supply expert to find the best materials for your project.
Preparing Your Metal Roof Surface
Getting your metal roof ready for insulation is key. A well-prepared surface means your roof will last longer and work better. I’ll show you how pros prepare the roof for insulation.
Cleaning Requirements
A clean roof is essential for insulation. Start by removing all dirt and debris:
- Use a stiff-bristled brush to sweep away loose debris
- Pressure wash the roof to get rid of dirt
- Apply a metal roof cleaner to remove oxidation
- Let the roof dry completely before moving on
Inspection Guidelines
Inspecting your roof is important to avoid future issues. Look closely at these areas:
| Inspection Area | What to Look For | Action Required |
|---|---|---|
| Metal Panel Condition | Rust, dents, or structural damage | Repair or replace damaged sections |
| Fastener Integrity | Loose or corroded fasteners | Tighten or replace all compromised fasteners |
| Surface Flatness | Warping or uneven surfaces | Flatten or add shimming as needed |
Surface Repairs
Fixing the roof before insulation is a must. Here’s how to do it:
- Patch small holes with metal patch kits
- Replace severely damaged metal panels
- Apply rust-inhibiting primer to prevent future corrosion
- Ensure a smooth, even surface for insulation installation
Spending time on roof preparation is worth it. These steps will make your insulation work better and protect your building.
Measuring and Planning Your Installation
Getting ready for rigid foam insulation needs careful measuring and planning. When figuring out how thick to make the insulation, consider a few important factors. These will help your project succeed.

First, make a detailed roof measurement plan. Follow these steps for accurate preparation:
- Measure your roof’s total surface area carefully
- Look for any vents or chimneys that might get in the way
- Figure out how much insulation board you’ll need
- Check what your local building codes say
The thickness of rigid foam insulation varies from 1 to 4 inches. This depends on your climate zone and how energy-efficient you want your roof to be. The climate you live in is key to choosing the right insulation thickness.
| Climate Zone | Recommended Insulation Thickness | R-Value Range |
|---|---|---|
| Cold Regions | 3-4 inches | R-15 to R-20 |
| Moderate Regions | 2-3 inches | R-10 to R-15 |
| Warm Regions | 1-2 inches | R-5 to R-10 |
I always suggest making a detailed layout sketch before buying materials. This way, you avoid waste and make sure you have the right amount of insulation for your metal roof.
Rigid Foam Insulation Under Metal Roof: Step-by-Step Guide
Installing foam insulation under a metal roof needs careful planning and exact steps. I’ll guide you through the key steps for a top-notch installation. This will make your roof more energy-efficient.
Cutting and Fitting Panels
When you’re ready to attach foam insulation to your metal roof, getting the measurements right is key. Here’s what to do:
- Measure the roof surface accurately
- Use a sharp utility knife for clean cuts
- Make sure panels fit well between roof supports
- Leave small gaps for thermal expansion
Securing Foam Boards
Attaching foam insulation to your metal roof needs a few methods. I recommend using both adhesive and mechanical fasteners for the best hold.
- Apply high-quality construction adhesive to the back of panels
- Use specialized roofing screws with large washers
- Follow the manufacturer’s spacing for fasteners
- Press panels firmly against the roof
Sealing Joints and Seams
Creating a tight seal is vital when installing foam board insulation. Use foam board tape or professional-grade sealant to seal any air gaps between panels.
- Clean surfaces before applying sealant
- Use foam-compatible tape for best results
- Apply sealant in continuous, even strips
- Check for complete coverage around edges
By following these steps, you’ll install rigid foam insulation well. It will improve your metal roof’s thermal performance and energy efficiency.
Installing Vapor Barriers and Moisture Protection
When you put rigid insulation under metal roofs, keeping moisture out is key. Vapor barriers stop condensation and keep your roof strong. Let’s look at how to manage moisture well.
Choosing the right vapor barrier is essential. Different materials offer different levels of protection. Here are a few:
- Polyethylene sheets
- Foil-faced insulation
- Specialized synthetic membranes
The main job of a vapor barrier is to stop moisture from moving between different temperatures. When you install insulation under metal roofs, you need a continuous barrier. This barrier stops water vapor from getting into the insulation.
How you install the vapor barrier is very important. Here are the main steps:
- Clean the roof surface well
- Check for any moisture damage
- Pick the right vapor barrier material
- Make sure it covers everything with no gaps
- Seal all seams and edges carefully
Experts say to use good tape or special adhesives for a tight seal. This helps keep moisture out and makes your roof stronger.
But, managing moisture is more than just using vapor barriers. Ventilation, drainage, and regular checks are also key. They help keep your roof dry and working well.
Read also: How to Install Rigid Foam Insulation under Metal Roof?
Ventilation Requirements and Solutions
Proper ventilation is key for a healthy metal roof. When you install rigid foam insulation, air circulation is vital. It keeps your roof lasting longer and working better. Let’s explore the ventilation strategies that protect your investment and keep your roof in great shape.
Good ventilation stops moisture buildup, cuts energy costs, and makes your metal roof last longer. If you’re facing ventilation issues, reach out to us for expert advice.
Soffit Ventilation Techniques
Soffit vents are essential for air movement. They’re under the roof’s overhang, letting fresh air into the attic. Here are some important tips:
- Put in continuous soffit vents for the best air intake
- Make sure there’s a clear path for airflow between insulation and roof deck
- Have at least 1 square foot of ventilation per 300 square feet of attic space
Ridge Vent Installation
Ridge vents work with soffit vents for natural air flow. At the roof’s peak, they let warm, moist air out. This prevents damage and moisture problems.
| Ventilation Type | Air Intake | Air Exhaust |
|---|---|---|
| Soffit Vents | High | Low |
| Ridge Vents | Low | High |
Air Flow Management Strategies
Managing airflow needs a balanced approach. Use both passive and mechanical ventilation to get the most from your metal roof. This could mean adding attic fans or wind-driven turbine vents for better air flow.
Looking for ventilation solutions? Contact us today to keep your metal roof in excellent condition.
Dealing with Common Installation Challenges
Installing rigid foam insulation under a metal roof can be tricky. It needs careful planning and problem-solving. As a DIY enthusiast, I’ve found that preparation is essential to overcome these challenges.
One big challenge is uneven roof surfaces. The metal roof’s structure might have small irregularities. These can affect the insulation’s performance. To fix this, I use foam shims or create a leveling system before placing the insulation panels.
- Check roof surface for significant bumps or dips
- Use foam shims to create an even base
- Ensure consistent contact between insulation and roof surface
Managing condensation is another big challenge. Moisture can build up quickly, harming the insulation’s performance and structure. Good ventilation is key to avoiding these problems.
Roof penetrations like vents, chimneys, and skylights need extra care. You must cut and fit insulation panels around these areas carefully. This ensures no gaps that could lower thermal efficiency.
- Use specialized cutting tools for precise fitting
- Apply foam-compatible sealants around penetrations
- Maintain continuous insulation coverage
Temperature changes can also affect rigid foam insulation under metal roofs. I choose high-quality foam boards with the right R-values. I also use a moisture barrier strategy to prevent thermal bridging and condensation.
Safety Precautions and Best Practices
When you’re learning to insulate a metal roof, safety comes first. Getting ready and using the right gear can stop accidents. Knowing the dangers and taking steps to avoid them will help you insulate your roof safely.
Working at Height
Working on a roof is tough. You need to set up ladders right and use safety gear. Here’s what I suggest:
- A sturdy extension ladder with non-slip feet
- Ladder stabilizers for extra support
- Fall protection harness and anchor points
- Non-slip roof shoes or boots
Personal Protective Equipment
When you’re installing insulation, wearing the right gear is key. It keeps you safe from injuries and irritation.
| PPE Item | Purpose |
|---|---|
| Safety Glasses | Protect eyes from debris and insulation particles |
| Work Gloves | Shield hands from sharp metal edges and insulation materials |
| Dust Mask/Respirator | Prevent inhalation of insulation fibers and dust |
| Long-Sleeved Shirt | Minimize skin contact with irritating materials |
Weather Considerations
The weather affects how to insulate a metal roof safely. Always check the forecast before starting. Stay away from:
- Rain or high humidity
- Strong winds
- Extreme temperatures
- Thunderstorm conditions
By following these safety tips, you’ll reduce risks and make your insulation project safe.
Maximizing Energy Efficiency with Proper Installation

To boost your roof’s energy efficiency, you need a smart plan. I’ll show you how to make your roof more energy-efficient and cut down on energy use.
For great insulation, focus on creating a solid thermal barrier. Using various insulation methods can greatly enhance your home’s energy use.
- Create a continuous insulation layer
- Minimize thermal bridging
- Ensure proper air sealing
- Combine different insulation types
For the best results, use a layered insulation method. Spray foam is great for filling in edges and small gaps. Rigid foam panels cover bigger areas well.
| Insulation Type | Best Used For | Energy Efficiency Impact |
|---|---|---|
| Spray Foam | Sealing Edges/Gaps | High |
| Rigid Foam Panels | Large Surface Coverage | Very High |
| Fiberglass Batts | Secondary Insulation | Medium |
Smart installation can cut heat transfer by up to 40%. This means big energy savings and a more comfortable home. It’s not just about the materials; it’s how you use them.
Professional vs DIY Installation Considerations
Choosing between a professional or DIY installation for rigid foam insulation under a metal roof is a big decision. While DIY can save money, it’s not always the best choice for everyone.
Here are the main things to think about when deciding between professional and DIY installation:
- Skill Level: Professional installers have lots of experience
- Time Investment: DIY projects take a lot longer
- Equipment Requirements: You might need special tools
- Potential Cost Savings: DIY can cut down on labor costs
Before starting, think about your own skills. Some homeowners can handle it, but others might find it too hard.
| Consideration | DIY Approach | Professional Installation |
|---|---|---|
| Skill Required | Advanced | Expert |
| Cost | Lower | Higher |
| Time Investment | Longer | Faster |
| Warranty Coverage | Limited | Comprehensive |
If you’re not sure about your skills, contact us today for a professional consultation. Our experts can check your roof and give you advice for the best insulation installation.
Signs you might need professional help include:
- Complex roof structure
- Limited DIY experience
- Lack of specialized tools
- Time constraints
The best choice depends on your situation, skills, and comfort with big home projects.
Conclusion
Installing rigid foam insulation under a metal roof is a wise choice for homeowners. It boosts energy efficiency. This guide has shown you how to make your roof more efficient, saving money and making your home more comfortable.
Adding rigid foam insulation to your metal roof needs careful planning and the right skills. Knowing how to install it properly makes your roof a strong shield for your home. It’s all about choosing the right materials and ensuring good ventilation.
Safety and accuracy are key when you’re working on this project. Whether you hire a pro or do it yourself, every step is important. The right insulation can make your home warmer in winter and cooler in summer, saving you money.
My last piece of advice is to be patient and thorough with your insulation project. Do your homework, prepare well, and ask for help if you need it. A well-done insulation job will make your home cozy and energy-efficient for many years.


