Are you fed up with high energy bills and chilly rooms? Poor insulation is a common problem, leading to drafts and wasted money. Fighting heat loss can be a real challenge and a big expense.
Installing faced insulation is a great way to boost your home’s energy efficiency. I’ll guide you through the process of installing faced insulation. This will help you make your home more comfortable and save on energy costs. Follow this easy-to-follow guide to learn how to do it yourself.
Read also: What Is the Difference Between Faced And Unfaced Insulation
Essential Tools and Safety Equipment for Insulation Installation
Getting ready for a faced insulation project means planning and the right tools. The right equipment is key for a safe and successful job. I’ll show you what you need for your insulation project.
Before you start, make sure you have the right tools and safety gear. Keeping your dust mask on is very important when working with insulation.
Required Tools and Materials
- Utility knife with sharp blades
- Tape measure
- Straight edge or metal ruler
- Staple gun
- Protective work gloves
- Safety glasses
Safety Equipment Checklist
| Safety Item | Purpose |
|---|---|
| Dust Mask | Protects respiratory system from insulation fibers |
| Safety Glasses | Prevents eye irritation and possible injury |
| Work Gloves | Protects hands from rough materials and cuts |
| Long-sleeve Shirt | Reduces skin contact with insulation fibers |
Preparation Guidelines
When working with faced insulation, take important precautions. Make sure your work area is well-ventilated and clear. Wear your dust mask tightly to avoid breathing in harmful particles. Also, check that all your tools are in good shape before starting.
- Clean the installation area well
- Wear all protective gear
- Ensure good lighting
- Have a first aid kit ready
By following these steps and focusing on dust mask safety, you’ll make your faced insulation project safer. Proper preparation not only keeps you safe but also makes the job more efficient and effective.
Understanding Faced Insulation and Its Benefits
Faced insulation is a big win for home energy efficiency. It has a built-in vapor barrier, adding extra protection to your home. This barrier stops moisture buildup, which can cause mold and damage.
Faced insulation has many benefits for your home:
- Enhanced energy efficiency
- Improved indoor comfort
- Moisture control
- Sound dampening capabilities
This insulation does more than just keep your home warm or cool. It blocks heat transfer well, saving you money on heating and cooling. Homeowners often see big savings on their energy bills after installing it.
| Insulation Type | Energy Savings | Moisture Protection |
|---|---|---|
| Faced Insulation | 15-25% | Excellent |
| Unfaced Insulation | 10-15% | Limited |
I suggest considering faced insulation for your home upgrades. Its vapor barrier offers better protection than regular insulation. It’s great for improving your attic, walls, or crawl spaces, managing both heat and moisture.
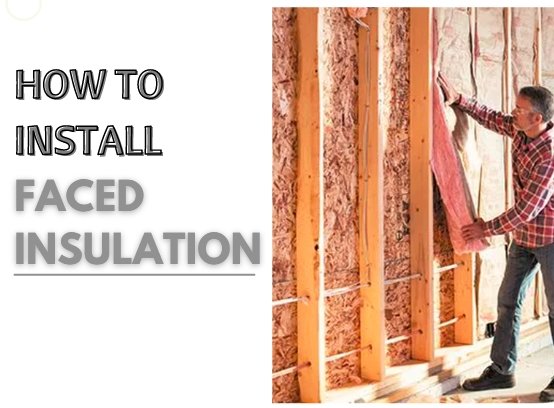
How to Install Faced Insulation: A Step-by-Step Guide
Installing faced insulation needs precision and attention to detail. As a homeowner, knowing the right techniques can boost your home’s energy efficiency and comfort. I’ll guide you through the essential steps to install faced insulation in your home.
Before starting, collect all needed materials and check the manufacturer’s guidelines. Also, make sure to follow local building codes for R-value and vapor barrier requirements.
Measuring and Cutting Techniques
Accurate measurement is key when installing faced insulation. Here are the important steps:
- Measure the cavity width precisely between studs or joists
- Use a sharp utility knife for clean cuts
- Cut insulation slightly larger than the cavity for a snug fit
- Wear protective gloves and safety glasses during cutting
Proper Installation Methods
When installing faced insulation, focus on these techniques:
- Ensure the vapor barrier faces the warm side of the wall
- Avoid compressing the insulation, which reduces effectiveness
- Fill cavities completely without leaving gaps
- Staple the facing to wooden framing carefully
Vapor Barrier Positioning
Proper vapor barrier positioning is key to prevent moisture issues. The faced side should always face the interior living space to block moisture migration.
| Installation Location | Vapor Barrier Direction |
|---|---|
| Heated Spaces | Facing Interior |
| Unheated Spaces | Facing Exterior |
| Mild Climates | Consult Local Building Codes |
By following these guidelines, you’ll make your home more energy-efficient and comfortable. Take your time, work carefully, and seek professional help if unsure about any step.
Read also: Basement Wall Insulation Blanket
Installing Insulation in Attic Spaces

Attic insulation is key to keeping your home energy-efficient. Homeowners can choose from batt insulation and blown-in cellulose insulation for this space.
I suggest using a two-layer insulation method for the best results. The first layer goes between the attic floor joists. The second layer runs at a right angle to the first, filling in any gaps.
- Batt insulation offers consistent coverage and is simple to install
- Blown-in cellulose insulation is great for hard-to-reach spots
- Layering insulation helps keep heat in and saves energy
Using blown-in cellulose insulation requires special tools for even spread. You must also watch out for ventilation and obstacles like recessed lighting or roof vents.
| Insulation Type | Pros | Best Used For |
|---|---|---|
| Batt Insulation | Easy installation, uniform coverage | Accessible, open spaces |
| Blown-in Cellulose | Excellent coverage, fills small gaps | Irregular spaces, hard-to-reach areas |
Pro tip: Always wear protective gear when installing attic insulation. Make sure there’s good ventilation and don’t squish the insulation. If you’re not sure, get a professional insulation contractor for the job.
Wall Cavity Installation Techniques
Installing batt insulation in wall cavities needs precision and attention to detail. I’ll show you how to install faced insulation well. This will make your home more energy efficient and comfortable.
First, understand the challenges of wall cavities. Each wall has its own obstacles. You need a strategic plan for insulation placement.
Electrical Outlet Considerations
When working around electrical outlets, follow these steps:
- Turn off power to the area before starting
- Cut batt insulation carefully around outlet boxes
- Ensure no gaps exist around electrical components
- Use insulation designed for tight spaces
Window and Door Framing Techniques
Framing areas need special care during insulation installation. I suggest:
- Measure framing spaces precisely
- Cut insulation slightly larger than cavity
- Gently push insulation into space without compression
- Seal edges to prevent air infiltration
Securing Insulation Effectively
Securing batt insulation keeps it from sagging. This maintains its thermal performance. Use staples or wire supports to keep it in place. Make sure it covers the area well without compressing it.
By using these techniques, you’ll create a strong thermal barrier. This will boost your home’s energy efficiency and comfort.
Basement and Crawlspace Insulation Methods
Insulating basements and crawlspaces needs careful planning and special techniques. These areas are key for keeping your home energy-efficient and stopping moisture problems. Installing faced insulation in these areas creates a barrier. It helps control temperature and keeps moisture out.
For basement insulation, I suggest two main methods:
- Framed wall insulation with faced vapor barrier
- Unframed wall insulation techniques
- Ground moisture control strategies
When insulating basement walls, start with a clean, dry surface. Place the vapor barrier on the warm side of the insulation to stop condensation. Measure each wall section carefully, cutting insulation to fit snugly between framing members.
| Insulation Location | Recommended Method | Vapor Barrier Requirement |
|---|---|---|
| Basement Walls | Faced Insulation Between Studs | Kraft Paper Facing Toward Interior |
| Crawlspace Ground | Plastic Sheeting Coverage | 6-mil Polyethylene Recommended |
| Rim Joists | Spray Foam or Cut Insulation | Sealed Edges Required |
Crawlspace insulation needs extra care. I recommend a strong vapor barrier on the ground, using 6-mil polyethylene sheeting. This stops ground moisture from reaching your home’s foundation. Overlap the sheets by at least 12 inches and seal the seams with specialized tape for a continuous barrier.
By using these methods, you’ll protect your home from moisture damage and boost energy efficiency.
Common Installation Mistakes to Avoid
Even DIY experts can make big mistakes when installing faced insulation. These errors can hurt your home’s energy efficiency. Knowing these common mistakes can help you get the best performance from your insulation.
I’ll show you the top mistakes homeowners make with faced insulation. This will help you avoid problems that can lower your insulation’s effectiveness.
Compression Challenges
Compressing insulation is a big mistake many overlook. Squeezing or folding insulation materials cuts down its R-value. This can lead to:
- Reduced energy efficiency
- Higher heating and cooling costs
- Uneven temperatures
Vapor Barrier Placement Errors
Putting the vapor barrier in the wrong place can cause moisture issues. Make sure it’s facing the right direction for your climate. The wrong placement can cause condensation and mold.
Preventing Coverage Gaps
Leaving gaps in insulation is another big mistake. These gaps can let heat escape, reducing your insulation’s effectiveness. It’s important to measure and cut carefully to avoid these gaps.
Avoiding these mistakes will help your insulation work better. This will make your home more comfortable and energy-efficient.
Maintenance and Long-term Care Tips
Keeping your batt insulation in good shape is key for energy savings and comfort. Regular checks can spot problems early, saving you money.
I suggest inspecting your faced insulation yearly. Look out for these signs that mean it’s time for maintenance:
- Moisture accumulation
- Visible mold growth
- Pest infestation signs
- Compression or settling of insulation material
- Visible tears or damage in the insulation facing
Focus on areas that get wet or change temperature a lot. This includes attics, crawl spaces, and basements.
| Inspection Area | Potential Issues | Recommended Action |
|---|---|---|
| Attic | Moisture, roof leaks | Check vapor barrier, repair roof leaks |
| Walls | Pest damage, compression | Replace damaged batt insulation sections |
| Crawl Spaces | Humidity, mold growth | Improve ventilation, control moisture |
If you find big damage or ongoing moisture, it’s time for new insulation. Energy audits can give you a detailed look at your insulation’s performance.
Conclusion
Installing faced insulation can make your home more energy-efficient and comfortable. I’ve shown you how to do it, from getting ready to the final steps. This includes all areas of your home.
Good insulation is more than just following a guide. It’s about knowing how to do it right for each part of your home. Whether it’s the attic, walls, or basement, the key steps are the same. These include measuring, cutting, and placing the insulation carefully.
While DIY projects are fun, sometimes you need a pro’s help. Safety and accuracy are very important in home improvement. By paying close attention to detail, you’ll make your home more comfortable and save on energy costs.
Your effort to learn and apply the right insulation methods will really pay off. You’ll see your home work better and save money on energy. Be proud of your work and enjoy the benefits of a well-insulated home.


