Cold drafts and high energy bills can make your home uncomfortable and expensive. Drafty walls waste heat, making your heating system work too hard. Rigid foam insulation between studs is a great way to stop this energy loss.
In this guide, I’ll show you how to install rigid foam insulation between studs. This method makes your home more energy-efficient. You’ll learn about different insulation types and how to install them correctly. This way, your walls will keep your home warm and your energy bills low.
Whether you love DIY projects or just want better insulation, this guide is for you. You’ll get all the info you need to insulate studs with rigid foam like an expert.

Understanding Rigid Foam Insulation Types and Benefits
Rigid foam board is a top choice for home insulation. I’ll explain the main types and their benefits for xps foam board installation.
Choosing the right insulation is key for a home’s energy efficiency. Each type of closed cell foam board has its own r-value and performance.
Expanded Polystyrene (EPS)
EPS is the most affordable rigid foam option. It has:
- R-value of 3.6-3.8 per inch
- Lightweight and easy to handle
- Good for interior and exterior applications
Extruded Polystyrene (XPS)
XPS is a premium insulation material. It has:
- R-value of 5.0 per inch
- Excellent moisture resistance
- Ideal for below-grade and high-moisture areas
Polyisocyanurate (ISO)
ISO is the highest performance rigid foam insulation. It has:
- R-value of 6.2-6.5 per inch
- Superior thermal performance
- Excellent for energy-efficient construction
It’s important to compare these options to find the best insulation for your project. Each type offers unique benefits for your home’s thermal protection.
Why Choose Rigid Foam Insulation Between Studs
Rigid foam insulation is a top pick for those wanting to boost their home’s energy efficiency. It’s a game-changer for improving both energy use and comfort levels.
Rigid foam insulation has many benefits for wall cavities:
- Exceptional R-value per inch of thickness
- Superior moisture resistance
- Effective thermal bridging prevention
- Minimal space requirements
One big plus of rigid foam insulation is its ability to stop thermal bridging. Unlike old insulation methods, it doesn’t let heat slip through. This leads to less energy loss and lower bills for homeowners.
Another key benefit is its moisture resistance. Unlike some other insulations, rigid foam keeps its insulating power even when wet. It’s perfect for both inside and outside walls, protecting your home for years.
Here’s a quick look at its performance:
| Insulation Property | Rigid Foam Performance |
|---|---|
| R-Value per Inch | 4-6.5 |
| Moisture Resistance | Excellent |
| Thermal Bridging Prevention | Superior |
Choosing rigid foam insulation between studs means you’re picking a top-notch solution. It offers great energy efficiency and comfort. The upfront cost is worth it for the long-term savings and better indoor climate.
Essential Tools and Materials for Installation
Getting ready for a diy foam board installation needs careful planning and the right tools. I’ll show you the essential tools, materials, and safety gear for a successful rigid foam insulation project.
Read also: How to Remove Foam Insulation From Hands
Before starting your diy foam board installation, it’s important to gather the right tools. A well-prepared workspace can make a big difference. It can turn a smooth project into a frustrating one.
Required Tools for Cutting and Fitting
- Circular saw with fine-tooth blade
- Table saw for precise cuts
- Utility knife with extra blades
- Straightedge or metal ruler
- Measuring tape
- Dust mask
- Safety glasses
Materials You’ll Need
- Rigid foam insulation boards
- Foam board adhesive
- Caulk or foam sealant
- Measuring tape
- Foam board tape
Safety Equipment Checklist
- Safety glasses with side protection
- Heavy-duty work gloves
- Respiratory protection mask
- Long-sleeved shirt
- Closed-toe work boots
Proper preparation is key to a successful diy foam board installation. By investing in quality tools and safety equipment, you’ll ensure a smoother, more efficient insulation project. It will protect both your home and yourself.
Preparing Your Wall Cavity for Insulation

Before you start installing rigid foam insulation, you need to prepare well. I’ll guide you through the key steps for a successful insulation project on your wall’s interior side.
First, inspect your wall cavity carefully. Look for any damage, moisture, or structural issues that could affect your insulation.
- Inspect the wall cavity for signs of water damage
- Check for any structural irregularities
- Measure the exact dimensions of the wall space
- Clean the area completely
Choosing the right rigid foam insulation depends on a few important factors. Consider these when picking your insulation:
- Desired R-value for your specific climate zone
- Available space between wall studs
- Budget constraints
- Moisture resistance requirements
Foam board sizes usually come in standard sizes like 2 x 8 and 4 x 8 feet. Measure your wall cavities accurately to avoid waste and ensure a perfect fit. This preparation step is vital for the best insulation performance.
Pro tip: Always wear protective gear and ensure proper ventilation when working with insulation materials. Double-check your measurements and have all necessary tools ready before starting the installation.
Step-by-Step Guide to Installing Rigid Foam Insulation Between Studs
Starting with xps foam board installation might look tough. But, with the right steps, anyone can get great results. This guide will show you how to put rigid foam insulation between wall studs.
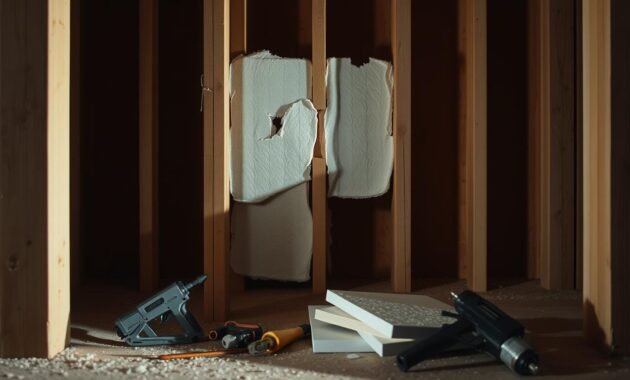
Before you start, get everything ready. Make sure you have all the tools and materials you need for a smooth installation.
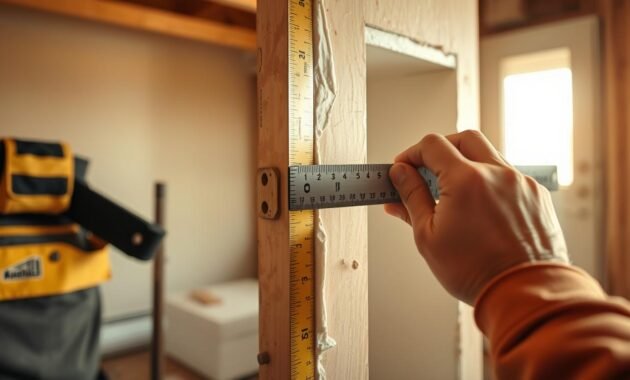
Measuring and Planning Your Insulation Project
Getting the measurements right is key. Here’s how to prepare:
- Measure the space between wall studs carefully
- Figure out how much square footage you need
- Add 1/4 inch extra for easier fitting
- Buy a bit more material than you think you’ll need
Cutting Techniques for Perfect Fit
When cutting foam boards, being precise is important. Try these methods:
- Use a sharp utility knife for clean cuts
- Score the board deeply first, then snap along the line
- For bigger cuts, use a circular saw with a fine-tooth blade
- Always wear safety glasses when cutting
Installation Methods
You have two main ways to install xps foam boards:
- Friction fitting: Place boards between studs carefully
- Adhesive method: Use foam board adhesive for extra hold
Tip for DIY foam board installation: Make sure the fit is tight. If it’s not, adjust or use adhesive to fix it.
Maximizing R-Value with Hybrid Insulation Methods
Using different insulation types together can greatly improve your home’s energy efficiency. The r-value of rigid insulation gets even better with a hybrid approach.
Think of a super-charged insulation strategy that goes beyond the usual. Mixing rigid foam with other materials can lead to amazing energy savings. I like using rigid foam with fiberglass to boost thermal protection.
- 2-inch rigid foam provides excellent initial insulation barrier
- R-13 fiberglass fills remaining stud cavity completely
- Total system achieves up to R-23 in standard 2×6 wall construction
This hybrid method offers big benefits for those looking to save energy. The rigid foam stops heat from escaping, while fiberglass adds more depth and coverage.
In colder areas, this method can cut down on energy costs and make your home more comfortable. It’s not just about blocking heat; it’s about creating a smart thermal barrier that outperforms single-material solutions.
Read also: 5 Common Spray Foam Insulation Roof
By choosing and layering insulation materials wisely, you can turn your walls into energy-saving machines. They’ll keep your home cozy all year long.
Moisture Management and Vapor Barriers
Keeping your home dry is key when you add rigid foam insulation. It stops damage and keeps your insulation working well for a long time.
Rigid foam insulation is great for keeping moisture out. If set up right, it acts as a strong barrier against water damage.
Critical Sealing Techniques
Sealing well is vital for keeping moisture and heat in check. Here are some tips:
- Use specialized foam tape to seal gaps between insulation panels
- Apply continuous foam layers to minimize moisture entry points
- Ensure tight connections between insulation and wall framing
Understanding Thermal Bridging Prevention
Thermal bridging happens when heat moves through solid parts, making insulation less effective. Rigid foam is a great fix for this issue.
| Insulation Type | Moisture Resistance | Thermal Bridging Prevention |
|---|---|---|
| Rigid Foam (2+ inches) | Excellent | High Effectiveness |
| Standard Fiberglass | Limited | Low Effectiveness |
By using these moisture control methods, you can build a strong insulation system. It will protect your home from water damage and keep it warm.
Common Installation Challenges and Solutions

Installing rigid foam insulation can be tricky, even for DIY experts. I’ve faced many challenges in my projects. Knowing how to overcome these can make your job easier and more successful.
One big problem is uneven stud spacing. Walls are never perfectly even. This means your foam panels might not fit perfectly. Here are some tips I’ve found helpful:
- Use a sharp utility knife to make precise cuts for tight-fitting insulation
- Keep a wooden block and hammer nearby to gently tap panels into place
- Measure twice and cut once to minimize waste and ensure proper fit
Electrical boxes and other wall obstructions can also be a problem. My solution is to make careful cutouts with a multi-tool or jigsaw. Take your time and make sure the cuts are clean and precise. Always turn off power and be careful when working around electrical components.
Moisture is another big challenge. To avoid water damage, I suggest:
- Checking for existing moisture before installation
- Using a vapor barrier when necessary
- Ensuring proper sealing around edges and penetrations
Pro tip: Always wear protective gear like safety glasses and work gloves during your diy foam board installation. A little preparation can prevent most common installation challenges and help you achieve a professional-looking result.
Cost Analysis and Energy Savings
Understanding the costs of energy efficient wall insulation is key. Rigid foam insulation is a smart choice that balances costs now with savings later. Studies show it’s worth the initial cost, even if it’s more than other options.
Material Investment Breakdown
The cost of rigid insulation depends on its r-value. It costs between $0.50 and $1.50 per square foot. This is more than fiberglass but less than spray foam.
- Expanded Polystyrene (EPS): Most affordable option
- Extruded Polystyrene (XPS): Mid-range pricing
- Polyisocyanurate (ISO): Highest cost, best performance
Long-Term Energy Savings
Choosing high-quality rigid foam can cut heating and cooling costs by up to 20%. Its high r-value means better insulation. This leads to big savings on your energy bills over time.
| Insulation Type | Average R-Value | Estimated Annual Savings |
|---|---|---|
| Fiberglass | R-3.5 | $200-$300 |
| Rigid Foam | R-5 to R-6 | $400-$600 |
My advice? Rigid foam insulation is a wise choice for your home’s energy and comfort.
Conclusion
In this guide, I’ve shared tips on making your walls more energy efficient. We talked about using rigid foam insulation between studs. This can really change how your home keeps warm or cool.
Choosing the right foam insulation isn’t just about saving money. It’s also about making your home cozy and keeping it dry. The methods we discussed can make your home much more energy efficient.
Before you start, think about what your home needs. Every house is different, and what works for one might not work for another. Getting advice from a pro can help you pick the best materials and how to install them.
By following these steps, you’ll make your home more comfortable and use less energy. This shows you care about making your home better for the planet. It’s a big step towards a more sustainable home.


