Are you tired of a freezing cold shed? It feels like an icebox, not a useful space. Uninsulated floors let cold air in, making it uncomfortable and damaging your stuff.
This guide will teach you about shed floor insulation materials and how to use them. You’ll learn to make your shed warm, energy-saving, and useful all year. It will protect your things and make your shed a cozy spot.
Learning the right ways to insulate your shed floor is key. It makes your storage area warm, strong, and ready for any weather or moisture.

Understanding the Importance of Shed Floor Insulation
Shed floor insulation is a big deal for keeping your shed safe and useful. I’ve worked on many sheds and know that insulation does more than just keep it warm.
To pick the right insulation for your shed floor in the UK, you need to know its benefits. Let’s look at why insulation is key for your shed.
Read also: Pros and Cons of Insulation between Floors?
Temperature Control Benefits
Insulation keeps your shed at a steady temperature. Learning how to insulate your shed floor brings many temperature benefits:
- It stops cold from getting in
- It keeps it warm in winter
- It cuts down heat in summer
- It makes your workspace more comfy
Moisture Protection Advantages
Moisture is a big enemy for your shed and its stuff. Good insulation keeps dampness out and damage away.
- It stops ground moisture from getting in
- It stops wood from rotting and sheds from falling apart
- It keeps tools and gear from rusting
- It lowers the chance of mold and mildew
Energy Efficiency Gains
Insulation also saves energy. It acts as a thermal shield, cutting down on heat loss and energy use.
- It stops heat from moving between the ground and inside
- It lowers your heating and cooling bills
- It makes your shed more eco-friendly
- It boosts your shed’s performance
Choosing good shed floor insulation is a wise move. It brings comfort, safety, and energy savings.
Essential Tools and Materials Needed
Insulating a shed floor needs the right tools and materials. I’ll guide you through what you need to insulate a wood floor from the top.
Essential Tools
- Tape measure for precise measurements
- Utility knife or saw for cutting insulation materials
- Drill or screwdriver for securing components
- Safety gear (gloves, safety glasses, dust mask)
- Construction adhesive
- Sealant or foam spray for closing gaps
Insulation Materials
- Rigid foam boards
- Fiberglass insulation
- Mineral wool
- Vapor barrier
- Plywood or OSB boards
Choosing the right insulation materials is key. They should match your shed’s needs, budget, and climate.
| Material Type | R-Value per Inch | Cost Effectiveness | Moisture Resistance |
|---|---|---|---|
| Rigid Foam Boards | 5.0 – 6.5 | High | Excellent |
| Fiberglass | 2.2 – 4.3 | Moderate | Fair |
| Mineral Wool | 4.0 – 4.3 | Moderate to High | Good |
Pro tip: Always measure twice and cut once when insulating a wood floor from the top. Good preparation and material choice are essential for success.
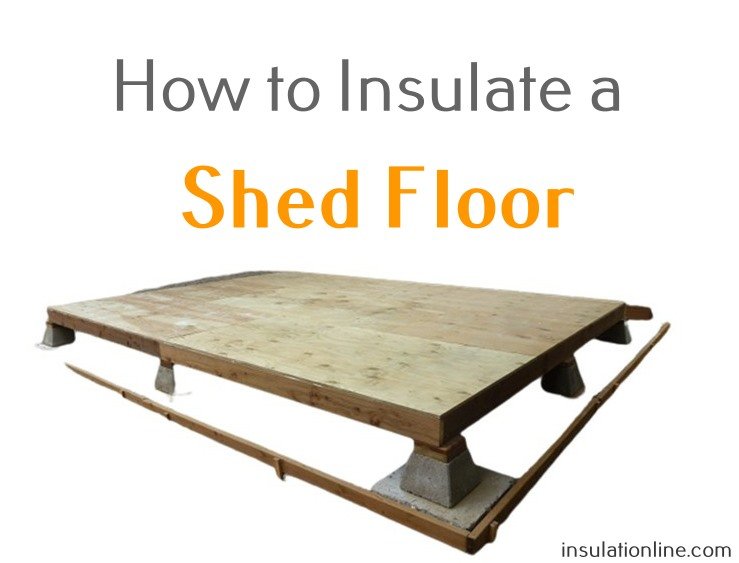
How to Insulate a Shed Floor
Insulating your shed floor can make your workspace more comfortable and energy-efficient. I’ll show you how to insulate from the top or inside. This guide is easy to follow for anyone.
First, understand the basic steps for a successful project. Proper preparation and technique are key to a well-insulated floor.
Preparation Steps
Clean the floor surface well. Remove debris, dust, or old flooring. Also, check for structural damage or moisture before insulating.
- Inspect the floor for cracks or uneven surfaces
- Clean the entire floor area completely
- Repair any structural damage
- Ensure the surface is dry and level
Installation Process
For insulating from the inside, follow these steps:
- Lay down a high-quality vapor barrier to prevent moisture
- Measure the floor space carefully
- Cut insulation materials to fit precisely
- Install insulation between floor joists
- Ensure tight, gap-free coverage
Finishing Touches
The final step is sealing and protecting your work. Use caulk or foam for gaps. Add a protective layer over the insulation.
Pro tip: Pick insulation with the right R-value for your climate and usage. This boosts energy efficiency and comfort.
By following these steps, you’ll get a well-insulated shed floor. It will control temperature and protect against moisture. Remember, careful attention to detail is essential for the best results.
Types of Floor Insulation Materials
Choosing the right insulation for your shed floor can greatly improve its comfort and energy use. Let’s explore the most popular types that can change your shed’s feel.
Several key materials stand out for their unique benefits:
- Rigid Foam Boards (XPS or PIR): These materials offer great heat resistance and keep moisture out. They’re light and simple to put in, making them a favorite among DIY fans.
- Mineral Wool: It’s known for being fire-resistant and good at blocking sound. This material helps control the temperature well.
- Fiberglass: A cost-effective choice that insulates fairly well and is easy to find.
- Expanded Polystyrene (EPS): It’s light, resists moisture, and helps control temperature and dampness.
Spray foam insulation is also worth noting. It seals all gaps in your shed floor. Though pricier, it offers top-notch heat protection and keeps moisture out.
The right choice depends on your needs. Think about your climate, how you’ll use the shed, your budget, and how long you want the insulation to last.
Cost Analysis of Different Insulation Options
Understanding the cost of insulating your shed floor is key. The cost can change based on materials, size, and how you install it.

I’ll explain the costs of insulating a shed floor. This will help you choose wisely, balancing quality and price.
Material Costs Breakdown
Insulation materials have different prices. Here’s a list of typical costs per square meter:
- Fiberglass: $10-$12
- Expanded Polystyrene (EPS) Board: $9-$11
- Polyisocyanurate (PIR) Board: $11-$14
- Extruded Polystyrene (XPS) Board: $18-$25
- Spray Foam: $20-$30
- Mineral Wool: $12-$16
Installation Expenses
Installation costs can add up. Doing it yourself can save money. But, hiring a pro ensures it’s done right. Costs range from $2 to $6 per square foot, based on the job and local rates.
Long-term Value Assessment
Insulating your shed floor might seem expensive at first. But, it saves energy, keeps the temperature right, and makes your shed last longer. Think about how much you’ll save on energy and compare it to the cost of insulation.
For those watching their budget, options like fiberglass or EPS board are good. They offer great insulation without breaking the bank. Just pick the right material for your shed’s needs.
Best Practices for Vapor Barrier Installation
Learning how to insulate a shed floor starts with vapor barrier installation. It stops moisture from getting to your insulation and causing harm. I’ll share my best tips for insulating your shed floor to keep it safe.
Choosing the right vapor barrier material is key. Polyethylene sheets are best for most shed floor insulation jobs. These plastic sheets block moisture well, keeping it away from your insulation.
- Choose 6-mil thick polyethylene sheets for maximum protection
- Ensure complete floor coverage without wrinkles or gaps
- Overlap seams by at least 6 inches for proper moisture control
- Use specialized vapor barrier tape to seal all connections
When insulating your shed floor, lay the vapor barrier on the ground first. Then add your insulation. Make sure the vapor barrier is smooth and the edges are secure. Pay close attention to corners and edges where moisture can get in.
Professional tip: Always check your vapor barrier for holes or tears before finishing your insulation. A small hole can ruin your moisture protection plan.
Common Mistakes to Avoid During Installation
Learning how to insulate a shed floor can save you time and money. Many DIYers make mistakes that hurt their project’s success. These errors can lead to poor insulation and damage over time.
Insulating your shed floor well needs careful planning and doing. I’ll share the common mistakes homeowners make during insulation projects.
Material Selection Errors
Choosing the right insulation is key. Here are common mistakes:
- Choosing the wrong insulation for your climate
- Not checking if the insulation can handle moisture
- Not thinking about how you’ll use your shed
Installation Pitfalls
Installing insulation correctly is essential. Here are mistakes to watch out for:
- Leaving gaps between insulation panels
- Not sealing edges and joints well
- Not installing a vapor barrier correctly
| Mistake | Potential Consequence | Prevention Strategy |
|---|---|---|
| Incomplete Coverage | Reduced Thermal Efficiency | Measure Carefully, Use Precise Cuts |
| Moisture Penetration | Potential Mold Growth | Install Proper Vapor Barrier |
| Compression of Insulation | Decreased R-Value | Maintain Recommended Thickness |
Maintenance Oversights
Your shed floor insulation needs regular checks. Look for moisture, pests, or damage yearly. This keeps your insulation working well.
Avoiding these mistakes will make your shed floor insulation better, last longer, and work more efficiently.
Maintaining Your Insulated Shed Floor
Keeping your shed floor insulated right needs regular care. I’ve worked with shed floor insulation for years. Proper maintenance can make your shed last longer and keep it well-insulated.
It’s important to check your shed floor often. I suggest doing this at least twice a year. This helps spot any problems early on.
- Inspect for moisture buildup
- Check for signs of pest intrusion
- Look for any cracks or damage in the insulation
- Verify the integrity of the vapor barrier
Keeping your insulated shed floor clean is easy. Here are some simple steps to keep it in great shape:
| Maintenance Task | Frequency | Purpose |
|---|---|---|
| Sweep and clean floor | Monthly | Remove debris and prevent moisture accumulation |
| Check vapor barrier | Bi-annually | Prevent moisture penetration |
| Inspect insulation integrity | Annually | Ensure optimal thermal performance |
Watch out for signs of insulation trouble. Musty smells, damp spots, or sudden temperature changes are red flags. If you see these, it’s time for a closer look or maybe a pro’s help.
By using these tips, you’ll keep your shed in top shape for a long time. Remember, taking care of it now saves you from costly fixes later.
Professional vs DIY Installation Considerations

Choosing between a shed floor insulation contractor and a DIY project is a big decision. It depends on several important factors. These factors can affect how well your insulation works.
Going the DIY route can save you money and give you a sense of accomplishment. It’s good for small sheds and if you have basic building skills. But, it needs careful planning, accurate measurements, and a focus on details.
- Pros of DIY Installation:
- Lower upfront costs
- Personal learning experience
- Flexibility in scheduling
- Cons of DIY Installation:
- Risk of improper installation
- Potential material waste
- Time-consuming process
Professional contractors have skills that DIYers often don’t. They know how to handle moisture barriers and spot structural problems. They also ensure the job is done right. For big sheds or tricky environments, hiring a pro is wise.
So, what should you do? Think about your skills, how much time you have, and how complex the project is. Small, simple sheds might be DIY-friendly. But, for bigger or more complex projects, a professional is likely a better choice.
Measuring Insulation Effectiveness with R-Values
Learning to insulate a shed floor starts with knowing about R-values. R-values show how well insulation blocks heat. This affects your shed’s energy use and how cozy it feels.
Insulation types vary in R-values, which shows how well they keep temperatures steady. The higher the R-value, the better it keeps your shed’s temperature even.
- R-13 to R-15: Suitable for mild climates
- R-20 to R-25: Recommended for moderate temperature zones
- R-30 to R-38: Ideal for extreme temperature regions
Choose insulation based on your climate and what you’ll use your shed for. Weather, use, and budget all play a part in picking the right R-value.
When picking insulation, think about these options:
- Fiberglass batts
- Rigid foam boards
- Spray foam insulation
- Mineral wool
Knowing and picking the right R-value makes your shed more energy-smart and comfy.
Conclusion
Learning to insulate a shed floor can change your outdoor storage space. It’s not just about keeping it warm. It’s about protecting your stuff and making your shed last longer.
Insulating your shed floor has many benefits. It’s a small effort that makes a big difference. It keeps moisture out, saves energy, and makes your shed more stable.
Most people can do this project with simple tools and a plan. Whether you like to DIY or prefer a pro, knowing how to insulate is key. It helps you make choices that protect your investment for years.
In short, insulating your shed floor is a smart home improvement. It extends your shed’s life and improves its use. This small step can make a big impact on your outdoor storage space.


