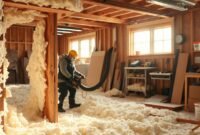
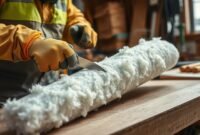
Are you tired of insulation falling from your walls or ceiling? It’s a big problem that can make your home less comfortable. It also wastes energy and can cause damage.
I’ve put together a detailed guide to stop attic insulation from sagging. You’ll learn about the best ways to keep it in place. This includes choosing the right materials and using effective support methods.
Discover how to keep insulation from falling down. You’ll find easy, effective solutions that save you time and money.

Understanding Different Types of Insulation Materials
Choosing the right insulation is key to an energy-efficient home. Various materials offer unique benefits. They help keep your ceiling insulation tight and prevent batts from falling. Let’s look at the most common insulation types to guide your choice.
Read also: How Many Inches of Insulation in Attic
Fiberglass Insulation Properties
Fiberglass is a favorite among homeowners. It’s light, affordable, and easy to install. But, it’s important to fix falling batts to keep it in place.
- Affordable and widely available
- Effective thermal barrier
- Requires careful handling to prevent falling
Blown-in Insulation Characteristics
Blown-in insulation is great for hard-to-reach spots. It’s perfect for securing loose ceiling insulation in attics and walls. The loose fill fills irregular spaces well, making a solid thermal barrier.
| Insulation Type | Coverage | Installation Difficulty |
|---|---|---|
| Blown-in Fiberglass | Excellent | Moderate |
| Blown-in Cellulose | Superior | Professional recommended |
Spray Foam Benefits
Spray foam insulation is the best for keeping insulation in place. It seals your home tightly, boosting energy efficiency. Though pricier, it’s unmatched in stopping air leaks and moisture.
- Creates perfect air seal
- Excellent moisture resistance
- Highest R-value per inch
- Prevents insulation from falling
Each insulation type has its own advantages. The right choice depends on your home, budget, and installation needs. Talking to a pro can help find the best insulation for your space.
Common Causes of Falling Insulation
Insulation can become a problem when it starts to drop or shift. Knowing why it happens helps homeowners keep it in place. This prevents energy efficiency issues.
Several key factors contribute to insulation falling down in residential spaces:
- Improper initial installation techniques
- Moisture accumulation in building cavities
- Age-related material degradation
- Inadequate support structures
- Temperature fluctuations
Moisture is a big challenge when stopping insulation from dropping. Water in insulation materials can make it sag, compress, and lose its thermal performance. Fiberglass and mineral wool insulation are most affected by moisture.
Structural issues like gaps, uneven surfaces, or weak attachment points can cause insulation to lose its grip. Gravity and vibrations gradually weaken the insulation’s position. This can lead to gaps that compromise your home’s thermal barrier.
Regular inspection and proactive maintenance are key to spotting insulation failure points. By understanding these common causes, homeowners can take steps to keep their insulation in good shape.
Essential Tools and Materials for Securing Insulation
Getting ready for insulation work means planning and the right tools. The right insulation support can make your project a success or a failure. I’ll show you the tools and materials needed to keep insulation in place.
First, you need the right supplies for wire insulation supports and insulation installation.
Read also: How to Cut Roll Insulation Accurately
Support Materials and Fasteners
- Wire mesh supports
- Staple guns
- Insulation wire hangers
- Rigid support brackets
- Compression clips
Safety Equipment Requirements
Keeping safe during insulation work is very important. Fiberglass and other materials can irritate skin and lungs if you’re not careful.
| Safety Item | Purpose |
|---|---|
| Safety Goggles | Protect eyes from particles |
| Respirator Mask | Prevent inhalation of insulation fibers |
| Long-Sleeved Clothing | Minimize skin contact with irritants |
| Work Gloves | Protect hands from cuts and irritation |
Installation Tools Checklist
- Measuring tape
- Utility knife
- Ladder or scaffolding
- Drill with appropriate bits
- Level
- Chalk line
Investing in good tools and safety gear makes insulation work easier and safer. Good preparation is essential for the best insulation support and lasting results.
How to Keep Insulation From Falling Down
Keeping insulation in place is key to keeping your home energy-efficient. I’ll share some easy ways to stop insulation from sagging or falling. This will help keep your home cozy and well-protected.
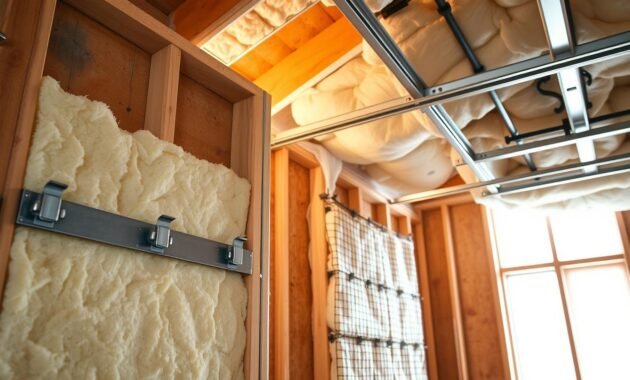
There are a few main ways to keep insulation from falling. Here are the top methods:
- Install wire mesh supports for loose or blown-in insulation
- Use specialized insulation supports and clips
- Create proper ventilation channels
- Seal air gaps and problem areas
When trying to keep insulation from falling, think about the type you have. Each type needs its own way to stay in place:
| Insulation Type | Best Support Method | Recommended Tools |
|---|---|---|
| Fiberglass Batts | Staple-up supports | Staple gun, wire supports |
| Blown-in Insulation | Wire mesh barriers | Chicken wire, support clips |
| Spray Foam | Professional application | Specialized spray equipment |
Professional tip: Check your insulation often. Look for signs of sagging, gaps, or compression. These can hurt your home’s energy efficiency. By using these support methods, you’ll save energy and keep your home comfortable.
Installing Proper Insulation Support Systems
Choosing the right insulation support methods is key for your home’s energy efficiency. Wire insulation supports prevent insulation from sagging or falling. This keeps your home’s energy efficiency high.
Different insulation types need specific support techniques. I’ll show you the best wire insulation supports and how to install them. This will keep your insulation in place.
Wire Support Installation Process
Installing wire supports needs careful planning and precise execution. Here are the main steps for installing wire insulation supports:
- Measure the space carefully before installation
- Select appropriate wire gauge for your insulation type
- Mark consistent support points along the installation area
- Secure wire supports at regular intervals
Mesh Support Techniques
Mesh support is an alternative to traditional wire supports for some insulation types. I suggest mesh supports for:
- Attic insulation projects
- Areas with irregular surfaces
- Spaces requiring additional structural support
Stapling Methods
Stapling is a key technique in insulation support methods. The right stapling can prevent insulation from shifting or falling:
| Insulation Type | Recommended Stapling Technique | Spacing |
|---|---|---|
| Fiberglass Batts | Perimeter Stapling | 6-8 inches apart |
| Spray Foam | Minimal Stapling | As needed for securing |
| Blown-in Insulation | Mesh Support Stapling | 12 inches apart |
By using these wire insulation supports and support methods, your insulation will stay effective. It will also be properly positioned for maximum energy efficiency.
Using Chicken Wire for Insulation Support
Chicken wire is a great, affordable way to keep insulation in place. I’ve seen it work wonders in many home projects. It’s perfect for both DIY fans and pros.
Chicken wire is great for holding insulation materials in place. It’s light and flexible, making it easy to use in many areas. You can cut and shape it to fit any space.
- Affordable alternative to specialized insulation supports
- Easy to cut and manipulate
- Provides consistent support across different areas
- Compatible with multiple insulation types
To install chicken wire, you’ll need some basic tools and a bit of skill. Use wire cutters, gloves, and safety glasses. Measure your area well and cut the wire to fit between joists or studs.
When using wire mesh, make sure it’s tight and even. Use staples or special fasteners to keep it in place. This will help your insulation stay stable.
Remember, chicken wire is just one part of the solution. Always check your insulation needs and local building codes. This ensures your work meets standards and works well.
Professional Installation Tips and Techniques
Mastering diy insulation retention needs precision and planning. As a pro with years of experience, I’ll share top tips to help you install blown-in insulation like an expert. The right method can greatly improve your home’s energy use and comfort.
Insulation installation is more than just filling spaces. It requires careful planning and attention to details for lasting performance.
Measuring and Cutting Guidelines
- Always measure twice before cutting insulation materials
- Use sharp utility knives for clean, precise cuts
- Account for electrical boxes and architectural features
- Leave minimal gaps to maximize thermal performance
Proper Spacing Requirements
For optimal diy insulation retention, spacing is key. Uneven installation can lead to thermal bridges and lower effectiveness.
| Insulation Type | Recommended Spacing | Coverage Factor |
|---|---|---|
| Blown-in Fiberglass | 12-16 inches | R-38 to R-49 |
| Cellulose Insulation | 14-18 inches | R-40 to R-60 |
Securing Techniques
Securing blown-in insulation needs special methods to prevent settling. I suggest using wire supports or mesh systems for stable barriers.
- Install wire supports at consistent intervals
- Use staple guns for securing mesh barriers
- Check for complete coverage before finishing
- Seal any possible air leakage points
Professional-grade installation is about technique and understanding each step’s impact on thermal efficiency. By following these tips, you’ll achieve an insulation system that rivals professional installations.
Maintaining Insulation in Crawl Spaces
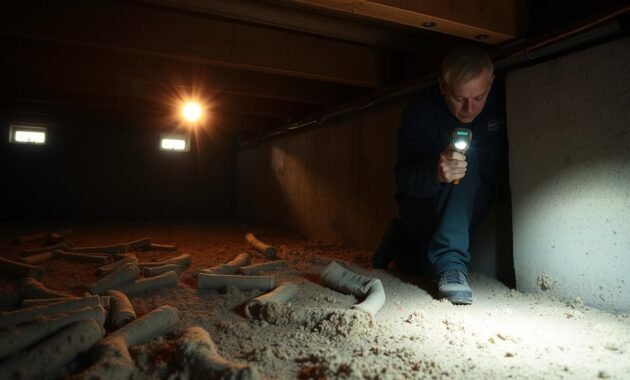
Crawl spaces are often ignored when it comes to home insulation. As a home improvement expert, I’ve seen many homeowners struggle. They try to prevent attic insulation sagging and secure loose ceiling insulation in these hard-to-reach areas.
Keeping crawl space insulation in good shape needs a smart plan. The goal is to create a barrier that stops moisture and helps your insulation work well. Here are some important steps to keep your crawl space insulation in top shape:
- Install a strong vapor barrier to keep moisture out
- Use wire mesh or special supports to keep insulation from falling
- Make sure there’s good ventilation to lower humidity
- Check often for signs of moisture or insulation damage
When securing loose ceiling insulation, I suggest using special support systems. These include:
- Insulation support wires
- Plastic fasteners
- Rigid foam board supports
Moisture is the biggest enemy of crawl space insulation. I’ve learned that a detailed approach is key. It’s not just about installing insulation. It’s about creating a whole system to manage moisture and protect your home’s insulation.
By taking these steps, you can stop attic insulation from sagging. You’ll also keep your home well-insulated and energy-efficient. Remember, a bit of maintenance can go a long way in keeping your home comfortable and structurally sound.
Preventing Moisture Damage to Insulation
Moisture can harm your home’s insulation, affecting energy efficiency and structure. It’s vital to protect falling batt insulation from moisture. This keeps it in place and working well.
Knowing how to control moisture is key for insulation owners. Too much moisture can cause big problems. It can make insulation less effective and lower its quality.
Critical Moisture Damage Prevention Strategies
- Identify moisture sources in your home
- Use proper ventilation systems
- Install effective vapor barriers
- Regularly check and maintain your insulation
Vapor Barrier Installation Guide
Installing a vapor barrier is a must to keep moisture out. I suggest using 6-mil polyethylene sheeting. It’s a great way to protect your insulation from moisture.
| Moisture Control Method | Effectiveness Rating | Installation Difficulty |
|---|---|---|
| 6-mil Polyethylene Barrier | High | Moderate |
| Spray Foam Insulation | Very High | Professional |
| Kraft Paper Facing | Medium | Easy |
Ventilation Requirements
Good ventilation stops moisture buildup. Make sure there’s enough air flow in attics, crawl spaces, and walls. This helps prevent moisture and keeps your insulation working right.
Using these moisture control methods can make your insulation last longer. It also keeps your home energy efficient.
Troubleshooting Common Installation Problems
DIY fans often face issues when trying to keep insulation from falling. I’ve found that being prepared and using the right techniques can solve most problems.
Some common issues include:
- Uneven surface gaps
- Moisture accumulation
- Improper material coverage
- Insufficient support structures
Fixing surface irregularities is key. I suggest measuring and cutting insulation to fit perfectly. This reduces gaps that could ruin your work.
Temperature also plays a big role. I tested how heat affects insulation and found it can weaken materials. Using a drop light, I saw temperatures up to 114 degrees in tight spots.
Here are some tips for keeping insulation in place:
- Use wire mesh supports for extra stability
- Apply proper stapling techniques
- Check for consistent material density
- Inspect installation regularly for any issues
Installing insulation well takes patience and focus. Knowing the problems and using smart solutions helps keep insulation in place. This ensures your space stays warm and cozy.
Signs It’s Time to Replace Your Insulation
Knowing when to replace your home’s insulation is key for keeping energy costs low and your home comfortable. As a homeowner, I’ve found that spotting the right time to fix falling batt insulation can save a lot of money and avoid damage.
There are several signs that tell you it’s time to secure loose ceiling insulation or replace it all:
- Unexplained increase in energy bills
- Visible damage or moisture in insulation materials
- Drafts or temperature inconsistencies in different rooms
- Age of existing insulation (typically 15-20 years)
- Pest infestations or signs of rodent damage
I suggest doing a detailed check of your home’s insulation. Look at crawl spaces, attics, and wall cavities for any signs of wear. Fixing falling batt insulation early can stop more costly repairs later.
| Insulation Condition | Recommended Action |
|---|---|
| Compressed or flat insulation | Replace immediately |
| Moisture damage | Remove and reinstall with proper vapor barrier |
| Visible mold or mildew | Professional removal and replacement |
| Significant air leaks | Seal and replace insulation |
Professional energy auditors can give a detailed check of your insulation’s state. They use special tools to find hidden problems and suggest the best ways to fix and replace insulation in your home.
Read also: How to Cut Roll Insulation Accurately
Conclusion
Exploring ways to keep insulation from falling down has taught me a lot. Proper installation is key to keeping your home energy-efficient. The right support methods can prevent sagging and ensure your home stays warm or cool.
Choosing the right support systems is essential. You can use wire supports, mesh, or get a professional to install it. The goal is always the same: to keep your home stable and energy-efficient.
Homeowners should regularly check their insulation. Fixing moisture issues and using good support methods can prevent problems. This way, you can make your home more comfortable and save money.
Keeping insulation in place is more than just comfort. It’s an investment in your home’s future and your family’s health. Take the time to check your insulation and use the right support. Enjoy a more comfortable and energy-efficient home.
