Are you tired of messy cuts with rigid foam insulation? Many people struggle with crumbling edges and uneven surfaces. These issues can ruin your insulation projects.
Learning to cut rigid foam insulation right is key. It can turn a DIY project into a professional job. I’ll show you how to do it step by step.
First, we’ll talk about the tools you need. Then, we’ll dive into the cutting techniques. Whether you’re working on a basement, wall, or roof, you’ll learn how to make clean cuts.
Understanding Rigid Foam Insulation Types and Applications
Rigid foam board is a strong solution for home insulation. It keeps your space comfy and saves energy. As a contractor, I’ve seen how it changes a building’s heat performance.
Read also: Attaching the Rigid Foam Insulation Between Studs
Rigid foam insulation has several types, each with special features. They fit different needs. Here are the main ones:
- Expanded Polystyrene (EPS): Most affordable option
- Extruded Polystyrene (XPS): High moisture resistance
- Polyisocyanurate (Polyiso): Highest R-value per inch
Key Benefits of Rigid Foam Insulation
Choosing the right rigid foam board boosts your building’s energy efficiency. These materials have big advantages:
- Exceptional thermal resistance
- Lightweight and easy to install
- Excellent moisture barrier
- Reduces mold growth
Ideal Applications for Foam Board Insulation
I suggest foam board insulation for key areas in building and renovation:
| Location | Recommended Foam Board Type |
|---|---|
| Exterior Walls | XPS or Polyiso |
| Foundation Walls | EPS or XPS |
| Roof Assemblies | Polyiso |
| Interior Insulation | EPS |
Knowing about these rigid foam board options helps you choose wisely. Each type has its own strengths for different projects.
Essential Tools and Materials for Cutting Rigid Foam
When you start cutting rigid foam insulation, the right tools are key. I’ll show you the must-haves for making clean cuts in foam insulation.
For most foam insulation projects, you’ll need these tools:
- Utility knife with sharp blades
- Straightedge or metal ruler
- Measuring tape
- Protective work gloves
- Safety glasses
- Dust mask
For more complex cuts, you might need special tools. Electric saws work well for big foam sheets. Hot wire cutters give smooth edges for detailed cuts.
It’s smart to use high-quality blades for your utility knife. Dull blades can mess up your cuts. Change blades often for clean cuts every time.
Pro tip: Always double-check your measurements before cutting. This saves time and materials in the long run.
- For small, precise cuts: Utility knife
- For large sheets: Electric saw
- For curved edges: Hot wire cutter
Choosing the right tools and taking your time will help you cut rigid foam like a pro. You’ll get clean, accurate results for your project.
Safety Precautions and Workspace Preparation
Working with rigid foam insulation needs careful safety steps. It’s important to protect yourself and set up a safe workspace. I’ll show you how to do this for a secure and efficient work area.
Protective Equipment Requirements
Before starting any project with rigid foam, you’ll need to gear up with proper protective equipment. Your safety kit should include:
- Safety glasses to protect your eyes from dust and debris
- Respirator or dust mask to prevent inhalation of foam particles
- Thick work gloves to protect your hands
- Long-sleeved shirt and pants to minimize skin exposure
Proper Ventilation Guidelines
Spray foam insulation and rigid foam cutting can release harmful particles and chemicals. It’s best to work in a well-ventilated area, like outdoors or a room with open windows and doors. If indoors, use fans for cross-ventilation to remove toxic dust.
Workspace Setup Tips
Creating the right workspace is key to safe rigid foam insulation projects. Here are my top tips:
- Choose a clean, flat surface for cutting
- Lay down a drop cloth to catch debris
- Keep your work area free from flammable materials
- Have a trash bin nearby for immediate debris disposal
- Ensure good lighting to see your cutting lines clearly
By following these safety precautions, you’ll protect yourself while working with spray foam insulation and rigid foam materials. Always prioritize your safety over speed or convenience.
How to Cut Rigid Foam Insulation: Basic Methods
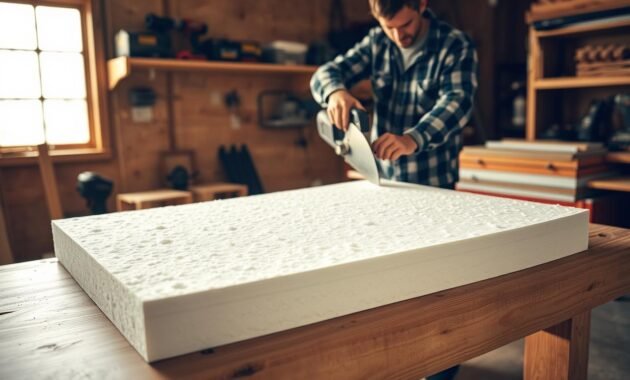
Learning to cut rigid foam insulation involves mastering a few key techniques. The method you choose depends on your project’s needs and the foam’s thickness.
Start with the simplest method for cutting rigid foam. A utility knife is great for thin boards and precise cuts. For bigger or thicker pieces, a circular saw is better. It makes quick, efficient cuts on big insulation projects.
- Choose the right tool based on foam thickness
- Ensure sharp cutting implements
- Measure and mark cuts carefully
- Support the foam board during cutting
Here’s how to use a utility knife:
- Measure and mark your cutting line clearly
- Use a straight edge as a guide
- Score the foam board lightly first
- Make multiple passes for clean cuts
- Apply consistent pressure
For bigger projects, a circular saw is the way to go. Use a fine-toothed blade to avoid crumbling and get smooth edges. Keep the saw steady and move at a consistent speed for professional results.
Remember, safety is key when cutting. Wear protective eyewear and work in a well-ventilated area. This protects you from foam dust and debris.
Using a Utility Knife for Precise Cuts
Cutting rigid foam insulation needs precision and the right technique. A utility knife is your best friend for foam board. It helps you make clean, accurate cuts for proper insulation.
Mastering the utility knife technique is key for your project’s quality. I’ll show you how to get professional-looking cuts.
Scoring Technique for Clean Edges
The scoring method is vital for smooth cuts in foam board. Here’s how to do it right:
- Use a sharp utility knife with a segmented blade
- Apply light pressure when making initial cuts
- Create multiple shallow passes instead of one deep cut
- Ensure your cutting surface is clean and flat
Multiple Pass Cutting Method
Thick foam board needs a strategic approach. The multiple pass cutting method is best for clean, precise edges:
- Start with a light first pass to score the surface
- Gradually increase cutting depth with each subsequent pass
- Maintain consistent angle and pressure
- Allow the knife to do the work – avoid forcing the blade
Tips for Straight Lines
Getting straight cuts in rigid foam insulation can be tough. Here are some helpful tips:
- Use a metal straightedge as a cutting guide
- Clamp the straightedge to prevent movement
- Check your blade’s sharpness before starting
- Work in a well-lit area to see your cutting line clearly
Remember, practice makes perfect when cutting foam board. Take your time, and don’t rush. With these techniques, you’ll be making professional-quality cuts in no time.
Advanced Cutting Techniques with Power Tools
Power tools can be a big help when cutting foam insulation. Circular saws are great for making straight cuts in large foam pieces. They make the job easier and faster.
Read also: Rigid Foam Over Batt Insulation, Why Not?
Choosing the right tool depends on your project. Here are some top picks for cutting foam:
- Circular Saw: Best for long, straight cuts across large foam insulation boards
- Table Saw: Provides maximum precision for clean, square edges
- Reciprocating Saw: Ideal for complex cuts and irregular shapes
For cutting foam with a circular saw, use a fine-toothed blade. It prevents chipping and makes cuts smoother. Make sure the saw is set a bit deeper than the foam to get clean cuts.
Always wear safety gear when using power tools. This includes eye protection, a dust mask, and work in a well-ventilated area. Also, keep your foam steady on a stable surface to avoid movement while cutting.
Pro tip: Start by practicing on scrap foam. This helps you get used to your tool and improve your cutting skills. It makes your actual project cuts more precise.
Specialized Tools: Hot Wire Cutters and Modified Putty Knives
Standard tools don’t always work well for cutting rigid foam board. Both pros and DIY fans have found special tools that make the job easier and more precise.
Cutting rigid foam needs the right tools for clean, smooth edges. Two top tools are hot wire cutters and modified putty knives.
Hot Wire Cutter Benefits
A hot wire cutter has many benefits for cutting rigid foam:
- Creates ultra-smooth, precise cuts
- Minimizes material waste
- Reduces dust and debris during cutting
- Works effectively with various foam board thicknesses
Sharpened Putty Knife Method
If you’re on a budget, a sharpened putty knife is a great choice. By sharpening a 2-inch putty knife, you get a tool perfect for small projects.
| Tool | Cutting Precision | Cost | Best For |
|---|---|---|---|
| Hot Wire Cutter | High | $50-$150 | Large, complex cuts |
| Modified Putty Knife | Medium | $5-$15 | Small, straight cuts |
Try both tools to see which fits your project best. Each has its own benefits, depending on your needs and budget.
Managing Dust and Debris During Cutting
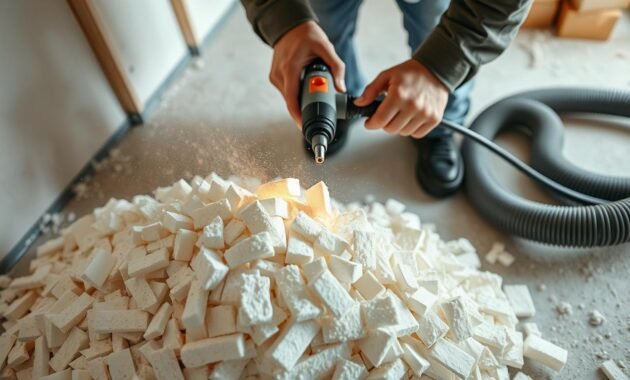
Working with foam board insulation means managing dust is key. Cutting it can make a lot of debris. It’s important to control dust to keep yourself and your space safe.
Dust from foam board can be harmful. Some insulation has chemicals that might hurt your health if you breathe them in. To avoid this, follow these steps to reduce dust:
- Work in a well-ventilated area with open windows or fans
- Wear protective respiratory masks rated for fine particle filtration
- Use plastic sheeting to contain work areas
- Invest in a shop vacuum with HEPA filtration
When cutting foam board, set up a clean workspace. Use drop cloths or plastic sheets to catch dust. Roll up these covers carefully to stop dust from spreading.
Cleaning up is as important as cutting. Use a HEPA-filtered vacuum or damp cloths to pick up dust. Don’t sweep, as it can send dust flying. Put dust and debris in sealed bags to keep it from spreading.
Troubleshooting Common Cutting Problems
Cutting rigid foam insulation can be tricky, even for DIY experts. I’ll share common issues and how to solve them. This will help you cut rigid foam insulation like a pro.
When you work with rigid foam, being precise is essential. You might face problems like crumbling edges, uneven cuts, and cutting thick foam. These issues can ruin your insulation project if not fixed right.
Preventing Edge Crumbling
Edge crumbling is a big problem when cutting rigid foam. Here’s how to avoid it:
- Use a sharp utility knife with a fresh blade
- Apply consistent, gentle pressure when cutting
- Make multiple light passes instead of one deep cut
- Support the foam board on a stable, smooth surface
Fixing Uneven Cuts
Uneven cuts can make your insulation less effective. Here’s how to get clean edges:
- Use a metal straightedge as a cutting guide
- Mark your cutting line clearly before starting
- Rotate the foam board instead of moving the knife
- Check and replace your cutting blade frequently
Dealing with Thick Foam Boards
Thick foam needs extra care. Here’s how to cut it right:
- Use a hot wire cutter for clean, precise cuts
- Make multiple shallow passes instead of one deep cut
- Ensure your work surface is clean and stable
- Use appropriate safety gear like protective glasses and gloves
With these tips, you’ll cut rigid foam insulation like a pro. Your insulation projects will look great.
Conclusion
Working with foam insulation needs skill, patience, and the right approach. I’ve shared many techniques to help you master cutting rigid foam for home projects. You now have a complete toolkit for success.
Safety is key when working with rigid foam. Always wear protective gear and work in well-ventilated areas. Take your time with each cut. The precision you develop will improve your insulation installation quality.
Whether you’re insulating a basement, workshop, or exterior wall, this guide will help. Each cutting method, like using a utility knife or hot wire cutter, has its own benefits. Your new skills will make you confident and professional in your projects.
By using these techniques and understanding rigid foam, you’ll make clean, accurate cuts. These cuts will improve your project’s performance and look. Enjoy learning and transforming your space with high-quality foam insulation.
