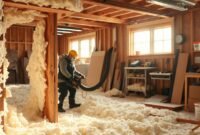
As winter approaches, many homeowners face the problem of cold walls inside. These cold surfaces make rooms uncomfortable. They can also raise energy costs and lead to mold growth. Luckily, there’s a fix: insulating your interior walls.
In this guide, we’ll show you how to insulate cold walls from the inside. We’ll cover everything from why walls get cold to picking the right insulation and how to install it. By the end, you’ll know how to make your home more energy-efficient and cozy.

Key Takeaways
- Identify the causes of cold walls in your home, such as poor insulation or thermal bridges.
- Understand the impact of cold walls on your home, including higher energy bills and potential for mold growth.
- Learn the step-by-step process for insulating interior walls, from choosing the right materials to proper installation.
- Discover the benefits of insulating cold walls, including energy savings and improved comfort.
- Troubleshoot common issues and find solutions to ensure your insulation project is a success.
Understanding Cold Walls: Causes and Consequences
Cold walls in your home can be frustrating and uncomfortable. Knowing the causes and effects is the first step to solving the problem. By understanding what makes walls cold, you can make your home warmer and more comfortable.
What Causes Cold Walls?
Cold walls often come from bad insulation, air leaks, or poor ventilation. Without enough insulation, your home loses heat, making walls cold. Air leaks around windows and doors let cold air in, making walls chilly. Poor ventilation can also trap moisture, causing condensation on cold walls.
The Impact of Cold Walls on Your Home
Cold walls can really affect your home and your life. They can lead to higher energy bills because you need to heat your home more. Cold walls also make your home feel uncomfortable and unwelcoming. Plus, they can cause mold and mildew, which is bad for your health and air quality.
Knowing why walls get cold and how it affects your home is key. By fixing these issues, like better insulation or sealing leaks, you can make your home warmer and more energy-efficient.
How to Insulate a Cold Wall from the Inside
Insulating cold walls from inside your home boosts energy efficiency and comfort. It’s a smart way to make your living space warmer and more cozy. By taking the right steps, you can turn cold, drafty walls into warm, insulated barriers.
Start by finding out why your wall is cold. Look for cracks, gaps, or places where air leaks in. Fixing these spots is key before adding insulation.
- Clean the wall well to get it ready for insulation.
- Measure the wall to figure out how much insulation you need.
- Pick the right insulation, like fiberglass batts or foam boards.
- Put the insulation in carefully, making sure it fits well and covers the wall.
- Seal any gaps or cracks with caulk or weatherstripping to stop air leaks.
- Finish with drywall, plaster, or other materials to make the wall smooth and insulated.
Good insulation keeps your home warm and prevents moisture buildup. This stops mold and other problems. Insulating your walls from inside saves energy, makes your home more comfortable, and is more efficient.
“Insulating your home’s walls is one of the most effective ways to improve energy efficiency and lower your utility bills.”
Success in insulating walls comes from paying attention to details and using the right methods. With the right tools and techniques, you can make your cold, drafty walls into a cozy, insulated space.
Preparing for Interior Wall Insulation
Preparing for interior wall insulation is crucial. You need to gather the right tools and materials for a smooth process. This guide will help you get ready for your house insulation project.
Tools and Materials Needed
Here’s what you’ll need to insulate your walls:
- Insulation materials (such as fiberglass batts, blown-in cellulose, or rigid foam boards)
- Utility knife or scissors for cutting the insulation
- Measuring tape to determine the wall dimensions
- Caulk gun and sealant for air-sealing gaps and cracks
- Protective gear, including safety goggles, gloves, and a mask
- Ladder or step stool for accessing higher wall areas
- Drywall tools (such as a drywall knife and joint compound) for any necessary wall repairs
Measure your walls carefully to buy the right insulation. Also, have all your tools and supplies ready before you start. This will help avoid any delays and make the installation go smoothly.
“Proper preparation is the key to a successful interior wall insulation project. Take the time to gather all the necessary tools and materials to ensure a smooth and efficient installation.”
Choosing the Right Insulation Material
Choosing the right insulation for your cold walls is key. The insulation you pick greatly affects your home’s warmth. Let’s look at the options and their benefits to guide your choice.
Fiberglass Batts
Fiberglass batts are a top pick for wall insulation. They keep your home warm and quiet. They come in different R-values for various climates and wall sizes.
Rigid Foam Boards
Rigid foam boards like EPS or XPS are great for walls. They block heat well and make your home tighter. This helps save energy and keeps your home cozy.
Spray Foam
Spray foam insulation fills wall cavities well. It seals air tight and insulates against heat and sound. It’s available in open-cell and closed-cell types, each with its own benefits.
When picking insulation, think about R-value, cost, and ease of use. The best insulation for you depends on your home and what you prefer.
“Proper insulation is one of the most effective ways to improve the energy efficiency and comfort of your home.”
Knowing about different insulation materials helps you choose wisely. This choice can make your home more comfortable and energy-smart.
Step-by-Step Guide to Insulating Interior Walls
Insulating your home’s interior walls can make it more energy-efficient and comfortable. It also helps get rid of cold spots. This guide will show you how to install insulation batts or rolls and apply rigid foam boards. Get ready to make your living space warmer and more cozy!
Installing Insulation Batts or Rolls
Insulation batts or rolls are a common choice for interior walls. Here’s how to install them:
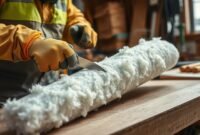
- Measure the wall cavities and cut the insulation to size, leaving a slight gap for expansion.
- Insert the insulation into the wall cavities carefully, ensuring a tight fit without gaps.
- Trim the insulation around electrical outlets, plumbing, and other obstructions using a utility knife or scissors.
- Secure the insulation with insulation supports or adhesive, if needed.
Applying Rigid Foam Boards
Rigid foam boards are also great for insulating interior walls. Here’s how to apply them:
- Measure the wall and cut the foam boards to size, leaving a slight gap around the edges.
- Apply a generous amount of adhesive to the back of the foam board and press it firmly against the wall.
- Secure the foam boards with mechanical fasteners, like furring strips or screws, especially on large walls.
- Seal any gaps or seams between the foam boards with a compatible sealant or tape to prevent air leaks.
Always follow the manufacturer’s instructions and safety guidelines when working with insulation. Proper preparation and attention to detail are key for a successful project.
Sealing and Finishing Insulated Walls
After you’ve installed the insulation, it’s time to seal and finish the walls. This step is key to making sure your insulation works well and looks great. Sealing air leaks and adding vapor barriers boosts the insulation’s performance and keeps moisture out. The final touches, like drywall, make your walls look nice.

Sealing Air Leaks
Look over the insulated walls for any air leaks or gaps. These can make your insulation less effective and let air in. Use a good caulk or foam sealant to seal these spots, especially around corners and outlets.
Read also: Great Stuff Insulating Foam Sealant
Installing Vapor Barriers
It’s important to put a vapor barrier in to stop moisture buildup. You can use a plastic sheet, foil-faced insulation, or a special vapor retarder. Place the barrier on the warm side of the insulation to control moisture and protect it from water damage.
Finishing the Walls
After sealing and adding the vapor barrier, you can finish the walls. This usually means putting up drywall, plaster, or other coverings. Make sure to follow the manufacturer’s instructions and best practices for a smooth, professional finish.
| Sealing Insulated Walls | Finishing Insulated Walls |
|---|---|
| Identify and seal air leaks using caulk or expanding foam Install a vapor barrier on the warm side of the insulation | Install drywall, plaster, or other wall coverings |
| Achieve a smooth, seamless finish that complements the overall design | Achieve a smooth, seamless finish that complements the overall design |
| Ensure a tight, continuous seal to prevent air and moisture intrusion | Achieve a smooth, seamless finish that complements the overall design |
Read also: Where Not to Use Expanding Foam
By carefully sealing and finishing your insulated walls, you get the most out of your insulation. This means better energy use, more comfort, and a nicer-looking home that’s worth more.
Benefits of Insulating Cold Walls
Insulating your home’s cold walls offers many benefits. It’s not just about keeping warm. It also saves energy and makes your home more comfortable. Let’s dive into these advantages.
Energy Savings
One big plus of insulating cold walls is saving energy. Insulated walls stop heat from escaping, which means your heating system works less. This leads to lower bills and better resource use. Homeowners often see a 40% drop in heating and cooling costs.
Improved Comfort
Insulating cold walls also makes your home more comfortable. It keeps the temperature steady and cuts down on drafts. Say goodbye to cold spots and constant thermostat adjustments. With good insulation, your home stays cozy all year.
| Benefit | Description |
|---|---|
| Energy Savings | Properly insulated walls can reduce heating and cooling costs by up to 40%. |
| Improved Comfort | Insulation helps regulate temperature and minimize drafts, creating a more comfortable living environment. |
Insulation tackles the problem of cold walls in a big way. It’s good for your wallet and your comfort. If you want to save money or just make your home warmer, insulating your walls is a smart choice.
Troubleshooting Common Issues
Even the best-planned insulation projects can face common challenges. When insulating walls from the inside, watch out for problems and fix them fast. Knowing these issues helps make your insulation project a success.
Air Leaks
Air leaks are a big problem with interior wall insulation. They let warm air out and cold air in, making insulation less effective. Look for gaps around outlets, pipes, and insulation edges. Use caulk or foam to seal these gaps for a tight seal.
Moisture Buildup
Too much moisture in walls can cause mold, mildew, and damage. Choose insulation that lets moisture out, not in. Also, make sure your home’s ventilation works well to keep humidity in check.
Improper Installation
Insulation not installed right loses its benefits. Make sure it fits well against framing and seals all edges. Getting help from a pro ensures it’s done right the first time.
Fixing these troubleshooting insulating walls and common issues with insulating walls boosts your insulation’s benefits. You’ll have a more comfy, energy-saving home.
| Common Issue | Potential Causes | Recommended Solutions |
|---|---|---|
| Air Leaks | Gaps around electrical outlets, plumbing pipes, or edges of insulation | Seal gaps with caulk or expanding foam |
| Moisture Buildup | Improper vapor permeability, poor home ventilation | Use vapor-permeable insulation, ensure proper home ventilation |
| Improper Installation | Insulation not fitted snugly against framing, edges not sealed | Follow installation instructions carefully, consult a professional |
Conclusion
In conclusion, insulating your cold walls from the inside is a smart move. It makes your home more energy-efficient and comfortable. By following this guide, you can pick the right insulation, install it correctly, and enjoy a warmer home.
Remember to fix any problems first and seal the walls well. This will help you get the best results.
Insulating interior walls or insulating exterior walls from inside greatly improves your home. With the right steps and care, you can make your home more cozy and energy-efficient. This is a great chance to make your home more comfortable.
This guide has given you the key info and steps to insulate your home well. By focusing on energy efficiency and the details, you can achieve great results. Enjoy the benefits of a well-insulated home for years to come.


