Are you fed up with high energy bills and uncomfortable home temperatures? Poor attic insulation can be a big problem. It makes your home feel too cold in winter and too hot in summer.
Drafty attics waste a lot of energy. This can cost you hundreds of dollars every year.
Learning to blow insulation in your attic can change everything. With just a weekend and some basic tools, you can make your home much more energy-efficient. I’ll show you how to do it step by step. This will help you save money and make your home more comfortable.
Understanding Attic Insulation Basics
Before you start blowing cellulose insulation in your attic, it’s important to know the basics. This knowledge helps make your home more energy-efficient. Proper attic insulation keeps your home warm in winter and cool in summer, saving you money on energy bills.
Choosing the right insulation material is key to your home’s energy use. Let’s explore the main points of attic insulation to guide your choice.
Read also: How to Blow Insulation in Walls
Types of Blown Insulation Materials
When using a blow in insulation machine, you’ll find two main materials:
- Cellulose: Made from recycled paper products, treated with fire retardants
- Fiberglass: Composed of fine glass fibers, lightweight and effective
R-Value Requirements by Region
R-value shows how well insulation keeps heat in or out. Each area has its own R-value needs:
| Climate Zone | Recommended R-Value |
|---|---|
| Cold Regions | R-49 to R-60 |
| Moderate Regions | R-38 to R-49 |
| Warm Regions | R-30 to R-38 |
Benefits of Proper Attic Insulation
Good attic insulation brings many benefits:
- Lower energy bills
- Better home comfort
- Better temperature control
- Higher property value
Knowing these basics will help you do a great job with your attic insulation project.
Essential Tools and Materials Needed
Before you start blowing insulation in your attic, make sure you have the right tools and materials. The cost can change based on what you need to buy or rent.
- Insulation Blower Machine (rental or purchase)
- Protective Safety Gear
- Respirator mask
- Safety goggles
- Work gloves
- Protective coveralls
- Measuring Tools
- Tape measure
- Depth markers
- Ruler or insulation depth stick
When thinking about the cost, remember to budget for these materials:
- Insulation material (fiberglass, cellulose, or mineral wool)
- Weatherstripping
- Caulk or foam sealant
- Attic baffles
The total cost can be between $500 to $1,500. This depends on your attic size and insulation type. Renting a blower machine costs $50 to $100 a day. Buying materials is your biggest expense.
Pro tip: Look for deals at local home improvement stores. They might offer rentals or packages that lower your cost.
Safety Precautions and Preparation
When working with attic insulation, safety is my top priority. Proper preparation is key to a successful project. It prevents health hazards. Whether you’re installing new insulation or removing old, taking the right precautions is essential.
Before starting any insulation project, I always recommend gathering the right protective equipment. Your safety gear is your first line of defense against risks in attic work.
Personal Protective Equipment
- Respirator or dust mask (N95 recommended)
- Safety goggles or protective eyewear
- Long-sleeved clothing
- Work gloves
- Hard hat or protective head covering
- Non-slip work boots
Workspace Safety Measures
When preparing to remove blown in insulation from attic spaces, I take several critical steps to ensure a safe working environment:
- Clear the work area of any personal items
- Ensure proper lighting
- Set up a stable ladder
- Keep a first aid kit nearby
- Work with a partner when possible
Attic Ventilation Requirements
Proper ventilation is critical when working with insulation. I always check for adequate airflow to prevent moisture buildup and mold growth. This means ensuring soffit vents are clear and that there’s sufficient air circulation throughout the attic space.
Pro tip: Before starting any insulation removal or installation, verify that your attic has proper ventilation. This not only protects your health but also ensures the long-term effectiveness of your insulation project.
How to Blow Insulation in Attic
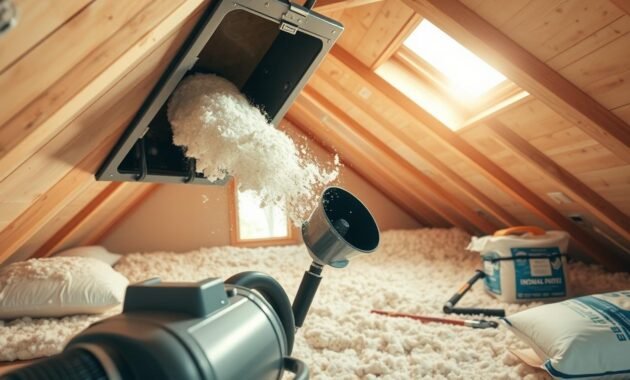
Blowing insulation in your attic is easy if you know the right steps. I’ll show you how to spray insulation in your attic right. This way, you’ll get full coverage.
First, get all your tools ready. The key to good insulation is being prepared and applying it right. You need to figure out how much insulation to use. This depends on your attic’s size and the R-value for your area.
- Position the blower machine near the attic access point
- Connect the flexible hose to the machine’s output
- Wear protective gear including a dust mask and safety glasses
- Begin filling from the furthest corner of the attic
Use a steady motion when blowing insulation. Move the hose in a back-and-forth pattern. This helps spread it evenly. Keep the hose close to the attic floor to avoid clumps.
Professional tip: Use markers or rulers to check the insulation depth. Most attics need 10-14 inches of insulation. This depends on the material and local rules.
- Check insulation depth frequently
- Avoid blocking soffit vents
- Maintain consistent coverage across the entire attic space
By following these steps, you’ll make a great thermal barrier. It will help keep your home’s temperature steady and cut down on energy costs.
Preparing Your Attic Space
Getting your attic ready is key for better energy use and comfort. The right steps can greatly improve your home’s warmth and comfort over time.
Before you start, it’s important to check your attic well. This means doing a few important things to make sure your attic insulation works best.
Air Sealing Requirements
Air sealing is a must-do before you insulate. I look for and seal any air leaks. These leaks can really affect how well your attic insulation works.
- Gaps around electrical outlets
- Plumbing vent penetrations
- Chimney and flue openings
- Recessed light fixtures
Installing Baffles and Vents
Good ventilation is key when insulating your attic. Baffles help keep air flowing and stop moisture. I install them between rafters to keep air moving.
Creating Proper Barriers
It’s important to put barriers around heat sources. This means using fire-safe covers for lights and keeping insulation away from heat. This helps decide how much insulation to use and keeps your home safe.
By taking these steps, you’ll get your attic ready for insulation. This will help save energy and keep your home strong.
Operating the Blow-in Machine
Working with a blow in insulation machine requires knowing how to use it right. This ensures your attic gets the insulation it needs. Let’s go over the essential steps for a smooth installation.
First, pick the right machine for your job. Machines vary based on the insulation material you’re using. This could be fiberglass, cellulose, or mineral wool.
- Check machine compatibility with your chosen insulation type
- Inspect all machine components before use
- Ensure proper electrical connections
- Wear appropriate safety gear
Handling the machine is important. Keep the feed rate steady and the speed consistent. This helps cover the area evenly. Start by loading the insulation into the machine’s hopper, but don’t overfill it.
Here are some tips for using your blow in insulation machine:
- Adjust the machine’s output settings based on insulation material density
- Move the machine’s hose in a systematic pattern
- Maintain a consistent distance from the attic surface
- Monitor insulation depth regularly
Always follow the manufacturer’s instructions for your machine. Each model has its own needs. These can affect how well the insulation works.
Proper Insulation Distribution Techniques
When you blow insulation in your attic, it’s key to spread it evenly. This helps save energy and keeps costs down. Experts pay close attention to how they spread it and how deep it goes.
Getting insulation right means two things: covering everything evenly and measuring the depth right. These steps affect how well your home keeps warm or cool. They also play a big role in the cost of insulation.
Coverage Patterns
For even insulation, follow a smart pattern:
- Begin at the attic’s farthest corner
- Work your way to the entrance
- Keep a steady motion
- Overlap areas to avoid gaps
Depth Measurements
Measuring insulation depth is important for good coverage and warmth. Here’s how to do it:
- Mark depth at set intervals
- Use a ruler or measuring stick
- Check depth in different spots
- Go for the recommended R-value thickness
By using these methods, you’ll get top-notch insulation. It will make your home more energy-efficient and help control costs.
Common Mistakes to Avoid
When you learn to blow in insulation in your attic, you might run into big problems. These mistakes can cost you time, money, and energy. Knowing what to avoid can save you a lot.
Many DIY fans make big mistakes that lessen their insulation’s effect. It’s important to know what to watch out for.
- Blocking Ventilation Spaces: Never cover soffit vents or roof ventilation areas
- Uneven Insulation Distribution: Ensure consistent coverage across the entire attic floor
- Inadequate Preparation: Skipping air sealing before insulation installation
- Incorrect Depth Measurements: Not achieving recommended insulation thickness
- Ignoring Moisture Barriers: Failing to protect against possible moisture damage
Knowing these common issues helps you do a better job of insulating your attic. Getting ready like a pro can really help your project succeed.
| Mistake | Potential Consequences | Prevention Strategy |
|---|---|---|
| Blocked Vents | Poor Attic Ventilation | Install Proper Baffles |
| Uneven Distribution | Inconsistent Thermal Protection | Use Consistent Blowing Technique |
| Insufficient Air Sealing | Energy Loss | Seal Gaps Before Insulating |
By avoiding these mistakes, you’ll make your insulation work better. This will make your home more energy-efficient and comfortable.
Post-Installation Steps
After finishing the attic insulation project, there’s more to do. You need to follow certain steps to keep your insulation working well. These steps help your attic stay warm or cool for a long time.
The last part of your project is cleaning up and checking everything. I’ll show you how to finish your attic insulation job right.
Cleanup Procedures
- Remove all protective coverings from floors and furniture
- Vacuum any loose insulation material around the work area
- Collect and properly dispose of any leftover insulation materials
- Clean tools and equipment used during the installation
Final Inspection Points
A detailed final check is key to making sure your insulation works right.
- Check for uniform insulation depth across the entire attic space
- Verify that all vents and fixtures remain unobstructed
- Inspect for any gaps or missed areas in the insulation coverage
- Confirm that ventilation channels remain clear
| Inspection Area | Check Details | Recommended Action |
|---|---|---|
| Insulation Depth | Measure consistently across attic | Ensure minimum recommended R-value for your region |
| Ventilation | Check soffit and roof vents | Clear any blocked airflow paths |
| Coverage | Look for missed spots | Fill in any gaps or thin areas |
By taking these steps, you’ll get the most out of your attic insulation. This ensures your home stays energy-efficient. A thorough approach means your investment in attic insulation will pay off.
Cost and ROI Analysis
Understanding the cost of attic insulation is key for homeowners. The cost to insulate an attic ranges from $500 to $1,500. This depends on the attic’s size and the insulation materials used.
Let’s break down the costs to help you decide. The investment includes several key parts:
- Material costs for blown insulation
- Equipment rental or professional installation
- Preparation and cleanup expenses
Homeowners can see big energy savings after insulating their attic. The return on investment (ROI) is great. Most people get their money back in 1-2 years by saving on heating and cooling.
| Insulation Type | Average Cost | Energy Savings |
|---|---|---|
| Fiberglass | $500 – $750 | 15-20% annual savings |
| Cellulose | $750 – $1,200 | 20-25% annual savings |
Professional installation might seem pricey, but it’s worth it. It ensures your attic is well-insulated for better energy efficiency. Doing it yourself can save 30-50% on labor costs.
Attic insulation is a smart long-term investment. The initial cost is repaid through ongoing energy savings and better home comfort.
Read also: Can You Paint Foam Board Insulation?
Conclusion
Blowing insulation in your attic can greatly improve your home’s energy use. I’ve shown you how to do it, from picking the right materials to the installation steps. It might seem hard, but with the right steps, you can make your home more comfortable and energy-efficient.
Getting your attic right is worth it for more than just saving energy. You’ll see better temperature control, lower bills, and a cozier home. Whether you do it yourself or get professionals, knowing how to insulate your attic helps you make good choices for your home.
Attic insulation is not just a task; it’s an investment in your home’s future and your family’s comfort. By following our advice, you can make your home more energy-smart, comfortable, and protected from temperature changes. Start now, stay up to date, and turn your attic into a key energy-saving spot.
Your home needs the best care, and proper attic insulation is key. With good planning, the right stuff, and a step-by-step plan, you can finish your attic job. Then, you’ll see the benefits right away and for years to come.
